
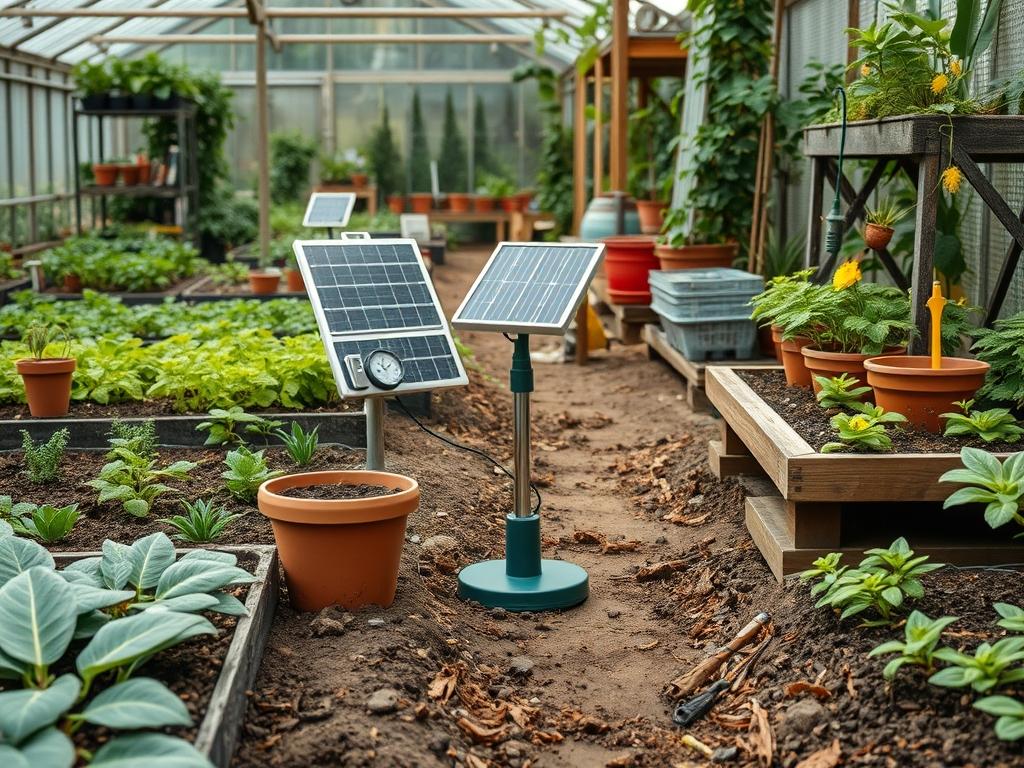
Modern landscape architecture faces a persistent paradox. Property owners demand high performance from their outdoor environments but strive to minimize the carbon footprint and installation complexity associated with traditional hardwired infrastructure. The emergence of high performance Solar Powered Garden Gear has shifted the paradigm. Designers no longer need to trench deep lines through established turf or pay for expensive electrical permits to achieve sophisticated lighting and water management. Instead, the focus has shifted toward harnessing the specific microclimates of a property to power the very tools that maintain it. This evolution impacts everything from basic curb appeal to the complex functionality of smart irrigation sensors. By integrating photovoltaic technology directly into the design phase, architects can create resilient spaces that respond to the environment in real time.
Integrating solar technology requires a deep understanding of site orientation and the movement of the sun across different seasons. In a modern yard, functionality must coexist with aesthetic appeal. Solar panels were once cumbersome and unsightly, but modern gear often hides these components or integrates them into the sleek lines of the hardware. The goal of a professional landscape design is to ensure that these elements serve a dual purpose. They act as functional tools for safety and growth while simultaneously elevating the visual profile of the home. This requires a strategic approach to placement, ensuring that solar collectors receive at least 6 to 8 hours of direct sunlight while remaining discrete enough to avoid cluttering the visual landscape.
Landscape Design Principles
Symmetry and focal points are the foundation of any well structured outdoor space. When planning a layout, a designer considers how the eye moves through the environment. Solar Spotlights can be used to emphasize architectural features or large specimen trees without the need for unsightly cables. By placing these lights at the base of a Retaining Wall or highlighting an ornamental Japanese Maple, we create depth that persists long after sunset. Elevation layers also play a critical role. Utilizing the natural slope of the land allows for the installation of solar powered water features where gravity assists the flow, reducing the energy demand on the pump.
Visual balance is achieved by distributing these technological assets evenly across the yard. If one quadrant of the garden is heavily lit while another remains in total darkness, the landscape feels disjointed. Walkways should be defined by Solar Path Lights spaced approximately 5 to 7 feet apart to provide a continuous guide for movement. Irrigation planning is another area where solar gear excels. Wireless Soil Moisture Sensors can be placed in various zones to communicate with a central hub, ensuring that water is only applied when the Loam or Sandy Soil reaches a specific dryness threshold. This localized data prevents the overwatering of plants on the north side of a structure while ensuring sun drenched areas receive adequate hydration.
Plant and Material Selection
The success of a solar integrated landscape depends heavily on the botanical environment surrounding the gear. Tall, dense foliage can quickly shade panels and render them useless. Therefore, material and plant selection must account for future growth and sun shadows.
| Plant Type | Sun Exposure | Soil Needs | Water Demand | Growth Speed | Maintenance |
| :— | :— | :— | :— | :— | :— |
| Lavender (Lavandula) | Full Sun | Well-drained | Low | Moderate | Low |
| Boxwood (Buxus) | Full to Partial | Neutral pH | Moderate | Slow | Moderate |
| Agave (Agavaceae) | Full Sun | Sandy/Gritty | Very Low | Slow | Very Low |
| Switchgrass (Panicum) | Full Sun | Adaptable | Low to Moderate | Fast | Low |
| Creeping Thyme | Full Sun | Well-drained | Low | Moderate | Low |
| Feather Reed Grass | Full to Partial | Moist/Heavy | Moderate | Fast | Low |
In addition to plant life, hardscaping materials such as Decomposed Granite, River Rock, and Flagstone provide excellent surfaces for solar gear installation. These materials do not grow or change shape, providing a stable foundation for Solar Motion Sensors and decorative lanterns. When selecting Organic Mulch, choose darker woods that can help retain ground heat, which may slightly benefit the efficiency of low mounted solar sensors during cooler months.
Implementation Strategy
Planning a backyard layout begins with a detailed site survey to identify the “solar window” of the property. Once the areas of maximum sun exposure are mapped, the technician begins the process of grading. Proper Grading ensures that water flows away from the foundations of both the house and the solar hardware. Even though most Solar Powered Garden Gear is rated for outdoor use, standing water can lead to mineral buildup on the lenses or corrosion of the internal battery compartments.
The next step involves edging and defining the boundaries. Using a Steel Edger or a Power Edger, create clean lines between the turf and the planting beds. This prevents grass from encroaching on ground level solar panels. Once the beds are prepped, a layer of Landscape Fabric can be applied under 3 inches of Hardwood Mulch to suppress weeds that might grow tall enough to shade the gear. When installing solar units, it is vital to angle the panels toward the south at an inclination that matches the local latitude. This maximizes photon capture throughout the day. For items like solar powered fountains or aerators, ensure the solar collector is tethered at the highest possible point, such as on top of a Privacy Fence or a Trellis, to avoid interference from surrounding shrubs.
Common Landscaping Failures
The most frequent mistake in solar integrated landscapes is improper spacing. As plants mature, their footprint expands significantly. A Solar Path Light that worked perfectly in the spring may be completely swallowed by the foliage of a Hydrangea by mid summer. Designers must plan for the “mature width” of every plant in the vicinity of solar sensors. Another failure point is soil compaction. High traffic areas around solar gear can lead to compacted earth, which prevents proper drainage and triggers localized flooding. Using Aeration Tools annually can mitigate this risk.
Irrigation inefficiencies also plague many yards. Placing solar sensors too close to an active Sprinkler Head can cause false readings or physical damage from high pressure water impact. Similarly, neglecting the “shadow zone” of a Retaining Wall or a large Oak Tree is a common error. A solar light placed just two feet inside a shadow will lose nearly 80 percent of its charging capacity. Finally, many homeowners fail to account for the build up of pollen and dust. A thin layer of grime on a Photovoltaic Cell acts as a filter, drastically reducing the lumen output of the device.
Seasonal Maintenance
Maintenance requirements fluctuate with the changing seasons. In the spring, the focus is on cleaning. Use a soft, damp cloth to wipe down the surface of all Solar Powered Garden Gear. This is also the time to check Lithium-Ion Batteries for any signs of swelling or leakage after the winter freeze. As the growing season picks up, prune any overhanging branches from Evergreens or Deciduous Trees that are beginning to cast new shadows.
During the summer, extreme heat can actually reduce the efficiency of some solar panels. Ensure that ground mounted units have enough airflow by clearing away excess Mulch or debris from their bases. Autumn requires a different approach. As leaves fall, they can quickly cover solar collectors. Regular leaf blowing or raking is essential to keep the gear operational. In the winter, the primary challenge is snow and shortened daylight. If a heavy snowfall occurs, gently brush the snow off the collectors using a Soft Bristle Brush. For northern climates where the sun stays very low on the horizon, consider moving portable solar units to the sunniest spots of the yard, even if it disrupts the original symmetry of the design for a few months.
Professional Landscaping FAQ
How do I choose the right spot for solar lights?
Identify areas receiving at least six hours of direct sunlight. Avoid placing gear under the drip line of trees or in the shadow of the house. Use a Solar Path Finder or observation to map daily sun movement.
Do solar powered tools work on cloudy days?
Yes, but with reduced efficiency. Modern Monocrystalline Panels can harvest energy from diffused light, though the battery will not reach a full charge as quickly as it would under clear skies. Performance may be noticeably lower.
When should I replace the batteries in my solar gear?
Most rechargeable solar batteries last between 2 and 3 years. If you notice the lights dimming early in the night or water features slowing down, it is likely time to install fresh high capacity batteries.
How do I prevent my solar panels from turning yellow?
Yellowing is usually caused by UV degradation of cheap plastic covers. To prevent this, choose gear with Tempered Glass or high quality polycarbonate lenses. Clean them regularly with a specialized UV protectant spray if necessary.
Can solar gear survive a hard freeze?
Most professional grade Solar Powered Garden Gear is rated for freezing temperatures. However, check that the housing is sealed against moisture. Expanding ice inside a poorly sealed unit can crack the internal Circuit Board or battery housing.