
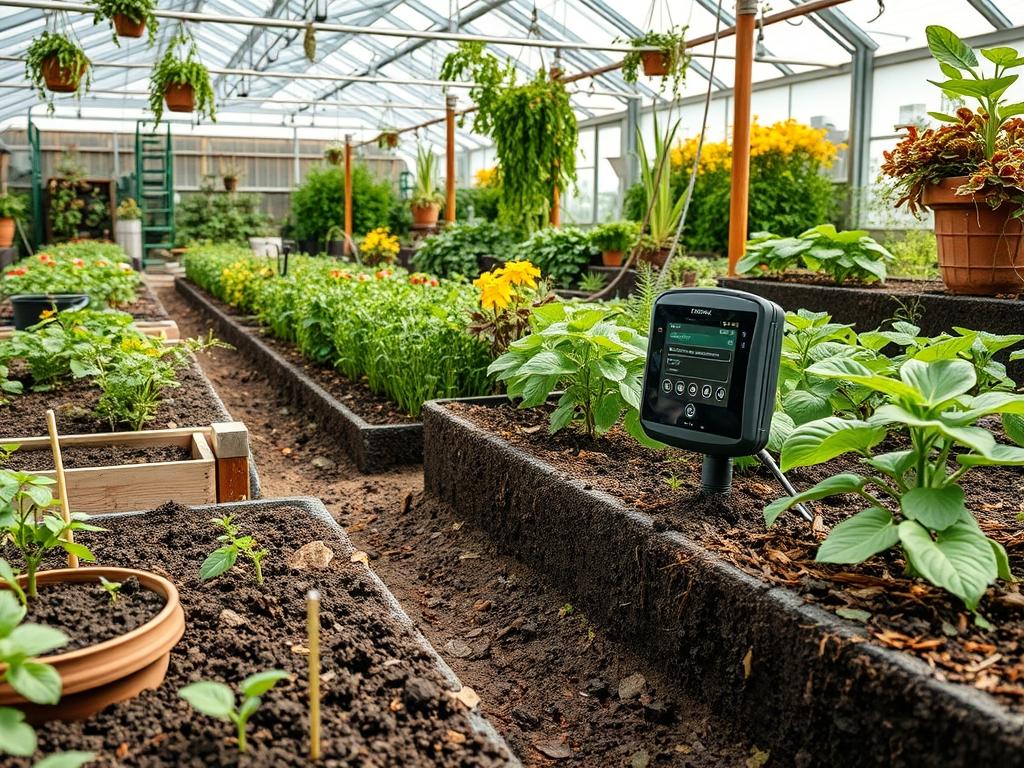
A modern landscape is no longer just a collection of flora and hardscaping; it is a sophisticated ecosystem where biology meets technology. As we integrate advanced irrigation and monitoring systems, the challenge of maintaining a robust Smart Garden Sensor Range becomes a central pillar of site planning. For a sprawling estate or even a tiered suburban lot, the physical environment acts as both a canvas and a barrier. Soil density, moisture content, and topographical shifts all influence how data travels from a moisture sensor in the far corner of the orchard back to the central hub. Achieving a seamless connection requires a deep understanding of how physical materials and botanical structures interact with radio frequencies. High-end curb appeal is now tethered to how well the “invisible” layer of the garden functions. If a sensor fails due to distance or obstruction, the resulting over-watering or under-watering can ruin a 5,000-dollar investment in specimen trees within a single season.
Landscape Design Principles
Successful garden planning begins with the concept of visual and functional layers. When we design for aesthetics, we look at symmetry and focal points, but when we design for connectivity, we must look at “line of sight.” A linear garden layout often provides the most reliable pathway for signal transmission. By creating clear corridors, such as gravel walkways or low-lying perennial borders, we reduce the number of physical obstacles like dense hedges or masonry walls that might degrade the Smart Garden Sensor Range.
Elevation layers play a dual role in this strategy. In a sloped yard, placing your primary gateway or hub at a higher elevation allows the signal to “look down” upon the peripheral nodes. This mimics the strategic advantage of a lighthouse. If your landscape includes retaining walls, consider the material carefully. A natural stone wall stacked with high iron content or backed by heavy clay can swallow a signal entirely. To counter this, we integrate “repeater nodes” into focal points, perhaps tucked inside a decorative cedar birdhouse or hidden behind a sculptural urn. This allows the aesthetic balance to remain undisturbed while extending the reach of the network to every corner of the property.
Irrigation planning must be synchronized with these sensors. By grouping plants into hydraulic zones (hydrozones) based on their water needs, we can place a single sensor in a representative location. This efficiency reduces the number of sensors needed and simplifies the network management. A well-placed moisture probe in a mulched garden bed provides the data necessary to automate a drip irrigation system, ensuring that water is delivered only when the volumetric water content of the soil drops below a specific threshold.
Plant and Material Selection
Choosing the right flora involves more than just hardiness zones; it involves understanding how the plant’s physical structure affects the environment. Dense, water-heavy foliage can act as a literal wall for high-frequency signals.
| Plant Type | Sun Exposure | Soil Needs | Water Demand | Growth Speed | Maintenance Level |
| :— | :— | :— | :— | :— | :— |
| English Lavender | Full Sun | Sandy/Well-drained | Low | Moderate | Low |
| Japanese Maple | Partial Shade | Loamy/Acidic | Medium | Slow | Medium |
| Switchgrass | Full Sun | Varied/Clay tolerant | Low | Fast | Low |
| Boxwood Hedge | Full Sun/Shade | Moist/Well-drained | Medium | Slow | High |
| Blue Star Creeper | Sun to Shade | Moist/Rich | Medium | Moderate | Low |
| Creeping Thyme | Full Sun | Poor/Well-drained | Low | Moderate | Low |
Materials also dictate the success of your Smart Garden Sensor Range. Using PVC conduit buried 12 inches deep protects any wired backhaul components from accidental spade strikes. When selecting mulch, be aware that shredded bark mulch holds more moisture than pea gravel. High moisture levels in the ground cover can lead to signal attenuation near ground-level sensors, especially after a heavy rain.
Implementation Strategy
The transition from a blueprint to a functional, “smart” backyard requires a phased approach. First, perform a site survey to identify the “null zones.” Before planting a single shrub, walk the perimeter with a handheld signal tester to see where the connection drops. Once the dead zones are mapped, begin the grading process. Proper grading is essential for drainage, but it also ensures that sensors placed in low-lying areas aren’t submerged during the spring thaw, which would instantly kill their transmission capability.
Next, install your hardscaping and conduit. If you are building a flagstone patio, run an extra 1-inch diameter pipe beneath it. This “future-proofs” the yard, allowing you to pull cables for Wi-Fi extenders or wired sensors without tearing up your stone work later. When placing the sensors themselves, use stainless steel mounting brackets to prevent rust. Ensure the probe is in direct contact with the “active root zone,” typically 4 to 8 inches below the surface for perennials and 12 to 18 inches for larger ornamental trees.
Finalize the layout by applying a 3-inch layer of organic mulch. This suppresses weeds and moderates soil temperature, which protects the sensitive electronics inside the sensor housings from extreme thermal fluctuations. Edging the beds with aluminum or plastic bender board keeps the mulch from migrating onto the lawn and keeps your sensors clearly visible for maintenance checks.
Common Landscaping Failures
The most frequent mistake in modern landscaping is “over-planting” for immediate impact. When six-foot privacy trees are planted too close together, their root balls eventually become a singular, impenetrable mass that can shift or crush buried automated valves and sensor wires. Furthermore, as the canopy thickens, it creates a “leaf-mass interference” that can decrease the Smart Garden Sensor Range by up to 40 percent.
Drainage mistakes are equally catastrophic. If a technician places a sensor in a depression without adequate sub-surface drainage, the sensor will eventually sit in a “perched water table.” This leads to false “saturated” readings or, worse, electronic failure due to moisture ingress. Soil compaction is another silent killer. In high-traffic areas, the soil becomes so dense that it lacks the air pockets necessary for sensors to get an accurate reading, often resulting in “ghost” data that suggests the soil is drier than it actually is. Finally, many homeowners fail to account for the “Faraday cage” effect of metal fencing or wrought-iron trellises. These structures can reflect signals back toward the source, preventing them from reaching the nodes on the other side.
Seasonal Maintenance
A landscape is a living entity that changes with the seasons, and your technology must adapt with it. In the spring, the primary goal is calibration. As the ground thaws, soil shifts can push sensors upward (frost heave). Inspect each probe to ensure it is still at the correct depth and that the lithium-ion batteries survived the winter.
During the summer, the focus shifts to “growth management.” Pruning is no longer just for aesthetics; it is for signal clarity. Thin out the interior branches of dense shrubs that sit between your hub and your furthest sensors. This “windowing” approach maintains the look of the plant while opening a path for data.
In autumn, clearing debris is vital. A thick layer of wet, decaying leaves over a sensor can act as a signal dampener. This is also the time to apply a fresh layer of mulch to insulate the soil for the coming cold. Finally, in winter, if you live in a region with deep freezes, it is often best to remove sensors that are not rated for sub-zero temperatures. For those that stay, ensure they are marked with a flexible fiberglass pole so they aren’t hit by a snow blower or shovel.
Professional Landscaping FAQ
How does soil type affect the sensor range?
Clay-heavy soils hold more water, which absorbs radio frequency energy more than sandy soils. In wet, heavy clay, your effective Smart Garden Sensor Range may be significantly reduced compared to dry, porous environments.
Can I hide my sensors under decorative rocks?
You can, but avoid metallic-flecked stones or heavy granite. Light, porous rocks like lava rock or pumice are better. Ensure the stone does not physically compress the sensor or block its vent ports.
What is the best height for a signal repeater?
For maximum coverage, mount repeaters at least 5 feet above the ground. This height clears most low-lying foliage and garden furniture, providing a cleaner line of sight across the property.
Do wireless sensors interfere with my home Wi-Fi?
Most professional sensors use LoRaWAN or Zigbee protocols, which operate on different frequencies or channels than standard Wi-Fi. This prevents interference, allowing your garden tech and home internet to coexist peacefully.
How often should I move my sensors?
Sensors should remain stationary for at least one full growing season to gather baseline data. Only move them if you change your plant palette or if permanent structures like a new shed block the signal.