
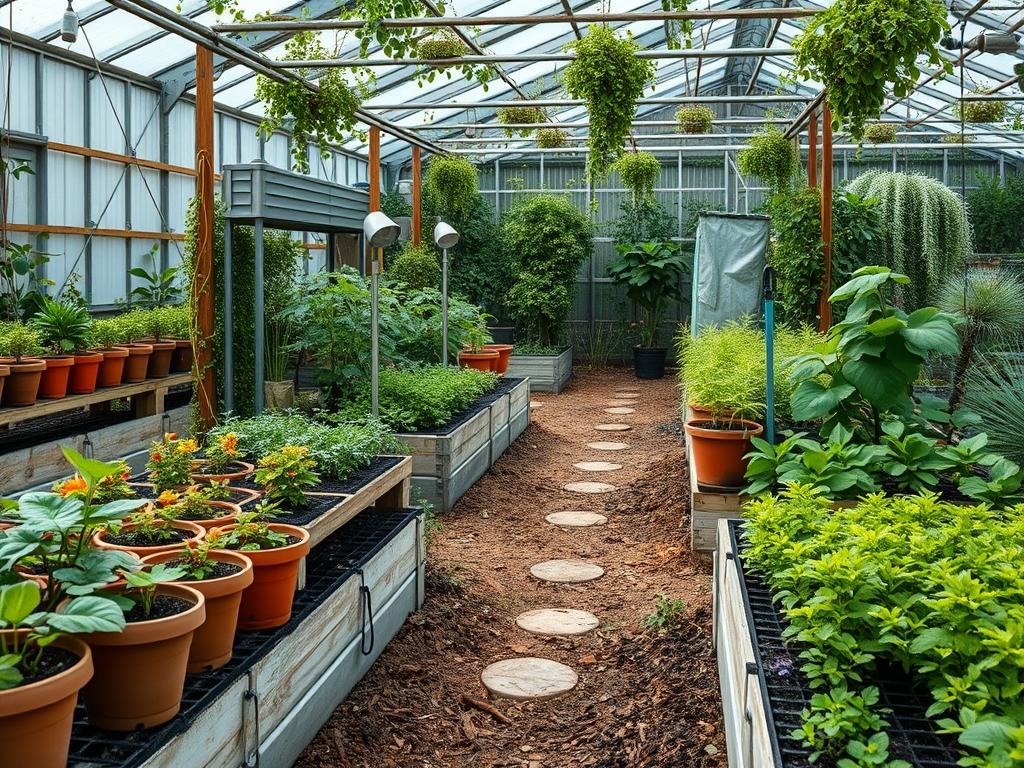
Modern landscape architecture no longer treats illumination as a secondary utility; it is now a core structural element. The challenge for many homeowners involves reconciling the harsh, utilitarian nature of traditional floodlamps with the sophisticated aesthetics of a curated garden. By utilizing Smart Outdoor Security Lights, designers can craft an environment that feels welcoming by day and impenetrable by night. This integration requires a deep understanding of local climate, as salt air or extreme humidity can degrade sensor hardware and bulb longevity. Beyond mere protection, these systems enhance curb appeal by highlighting architectural textures and guiding guests through the property safely. A successful plan balances the functional necessity of brightness with the subtle nuances of shadow, ensuring that the technology serves the landscape rather than dominating it.
Landscape Design Principles
A professional landscape design relies on the core tenets of symmetry and visual balance to guide the eye across a property. When integrating Smart Outdoor Security Lights, the goal is to create overlapping zones of visibility that eliminate blind spots without creating light pollution. Symmetry does not necessarily mean identical placements on either side of a path; rather, it refers to the perceived weight of the elements. For instance, a heavy retaining wall on the left might be balanced by a cluster of high-intensity lights on the right, housed within understated architectural fixtures.
Focal points are essential for directing traffic and attention. In a modern yard, a focal point might be a specimen tree like a Japanese Maple or a bespoke water feature. By aiming smart sensors toward these areas, you ensure that the most beautiful parts of your property are also the most monitored. Elevation layers play a significant role here as well. Using low-voltage lighting at the ground level, mid-level path lights, and high-mounted security hubs creates a three-dimensional security blanket. This layering prevents the flat, washed-out look often associated with standard motion lights.
Walkways and hardscaping provide the skeleton of the garden. These paths should be clear of debris and well-lit to prevent trips. Integrating smart tech into pavers or using bollard lights along a limestone walkway provides a seamless look. Furthermore, irrigation planning must be coordinated with electrical layouts. Designers must ensure that drip irrigation emitters are not spraying directly onto sensitive light housings, even if those housings are rated for outdoor use. Constant moisture ingress can lead to calcium buildup on lenses, which eventually obscures the visibility of security cameras.
Plant and Material Selection
Selecting the right foliage is critical to ensure that your security measures remain unobstructed over time. Large-leaf plants can trigger motion sensors during high winds, while invasive root systems can disrupt underground power lines. The following table provides a selection of plants that complement modern lighting schemes while remaining manageable.
| Plant Type | Sun Exposure | Soil Needs | Water Demand | Growth Speed | Maintenance Level |
| :— | :— | :— | :— | :— | :— |
| Boxwood (Buxus) | Full Sun to Part Shade | Well-drained, Loamy | Moderate | Slow | Medium |
| Lavender (Lavandula) | Full Sun | Sandy, Alkaline | Low | Medium | Low |
| Blue Switchgrass | Full Sun | Adaptable | Low to Moderate | Fast | Low |
| Oakleaf Hydrangea | Part Shade | Fertile, Moist | Moderate | Medium | Medium |
| Japanese Forest Grass | Shade | Moist, Humus-rich | High | Slow | Low |
| Creeping Thyme | Full Sun | Well-drained | Low | Medium | Low |
When choosing materials for the surrounding landscape, consider the reflective properties of your hardscaping. Dark slate pavers absorb light, which can be useful for reducing glare in sleeping areas. Conversely, light-colored pea gravel or white marble chips reflect light upward, increasing the efficiency of your Smart Outdoor Security Lights by brightening the lower canopy of your plants. This reflection can help cameras capture clearer footage in low-light conditions by naturally increasing the ambient lumen count.
Implementation Strategy
The transition from a design on paper to a physical garden requires a meticulous implementation strategy. Start with professional grading to ensure that water flows away from both the home foundation and the electrical junctions of your lighting system. A 2 percent slope is generally sufficient to prevent pooling. Once the grade is established, map out the locations for your Smart Outdoor Security Lights. Use wooden stakes to mark the placements and visualize the light spread before any digging begins.
Next, address the drainage requirements. Installing a French drain or catch basins in low-lying areas will protect both your plants and your tech investments. When laying out the electrical or data lines, use PVC conduit buried at least 18 inches deep to prevent accidental damage from gardening tools like shovels or aerators. If you are using wireless smart lights, ensure that your home Wi-Fi signal or mesh node reaches each location by testing with a signal strength meter before final installation.
Hardscaping should be installed before the final planting. Lay down a base of compacted gravel and bedding sand for any stone paths. Use steel edging or heavy-duty plastic edging to create crisp borders between mulch beds and turf. This prevents grass from encroaching on your light fixtures. Finally, when planting, apply a 3-inch layer of hardwood mulch or pine bark to retain moisture and suppress weeds. Ensure the mulch is kept a few inches away from the base of the light poles to prevent rot and insect nesting.
Common Landscaping Failures
One of the most frequent mistakes in outdoor planning is the failure to account for the mature size of plants. A small Evergreen planted next to a security camera might look perfect today, but in five years, its branches will obscure the lens entirely. This root and branch overcrowding not only ruins the aesthetic but also compromises the security of the property. Always refer to the maximum spread and height on the plant tag before digging your holes.
Improper spacing and soil compaction are also silent killers of a beautiful landscape. When heavy machinery is used during the installation of retaining walls or security poles, the soil often becomes too dense for roots to penetrate. This leads to poor drainage and “bathtub syndrome,” where water sits in the planting hole and rots the roots. Using a tiller or garden fork to break up compacted layers before planting is an essential step that many DIY installers skip.
Irrigation inefficiencies often lead to the premature failure of integrated tech. If a pop-up sprinkler head is positioned too close to Smart Outdoor Security Lights, the constant hitting of pressurized water can wear down seals. Furthermore, overwatering creates a humid microclimate that can lead to fogging inside camera lenses. Check your system using a pressure gauge and ensure that spray patterns are directed away from all electronic components.
Seasonal Maintenance
Landscape management is a year-round commitment that changes with the weather. In the spring, the focus should be on inspection and rejuvenation. Use a multimeter to check the voltage at each light fixture and ensure that winter freezes haven’t cracked any conduit. This is also the time to apply a fresh layer of organic mulch and prune any deadwood from trees that might be obstructing the view of your sensors.
Summer requires diligent hydration and growth control. High temperatures can cause sensors to drift or become less sensitive. Keep the areas around your Smart Outdoor Security Lights clear of tall weeds and fast-growing vines like Ivy or Clematis, which can quickly wrap around a light pole. During the autumn, the primary task is leaf management. Falling leaves can pile up against ground lights, causing them to overheat or creating a fire hazard. Use a leaf blower or rake regularly to keep these areas clear.
Winter maintenance involves protecting the hardware from the elements. If you live in an area with heavy snow, ensure that your light fixtures are cleared after every storm so the heat from the bulbs doesn’t cause an ice dam on the sensor. Check battery levels on wireless units, as cold weather significantly reduces battery efficiency. Finally, wipe down the lenses with a microfiber cloth and a mild cleaning solution to remove the salt and grime that often accumulates during the winter months.
Professional Landscaping FAQ
How do I choose the best location for my security lights?
Focus on entry points including doors, windows, and gates. Place lights high enough to prevent tampering but low enough to avoid casting long, distorting shadows. Ensure the beam overlaps with other lights to keep the entire perimeter visible to cameras.
Will security lights harm my nocturnal plants?
Most plants adapt well to artificial light, but some species require total darkness to trigger flowering. Use smart scheduling to dim lights during late hours or utilize sensors that only activate when motion is detected to minimize biological disruption.
What is the best mulch for lighting zones?
Darker organic mulches like triple-shredded hardwood provide a clean aesthetic and help hide black cables. Avoid light-colored stone mulch if you want to prevent excessive light bounce, which can sometimes wash out the night vision on security cameras.
Can I integrate smart lights into an existing irrigation system?
Yes, but you must ensure that all electrical connections are housed in waterproof junction boxes. It is critical to adjust your sprinkler heads so they do not spray directly onto the fixtures to prevent mineral deposits and seal failure.
How often should I clean my outdoor light sensors?
Perform a visual check monthly. Use a soft, damp cloth to remove dust, spider webs, and bird droppings. During pollen season or high-wind autumn months, you may need to clean them more frequently to maintain optimal sensor accuracy and video clarity.