
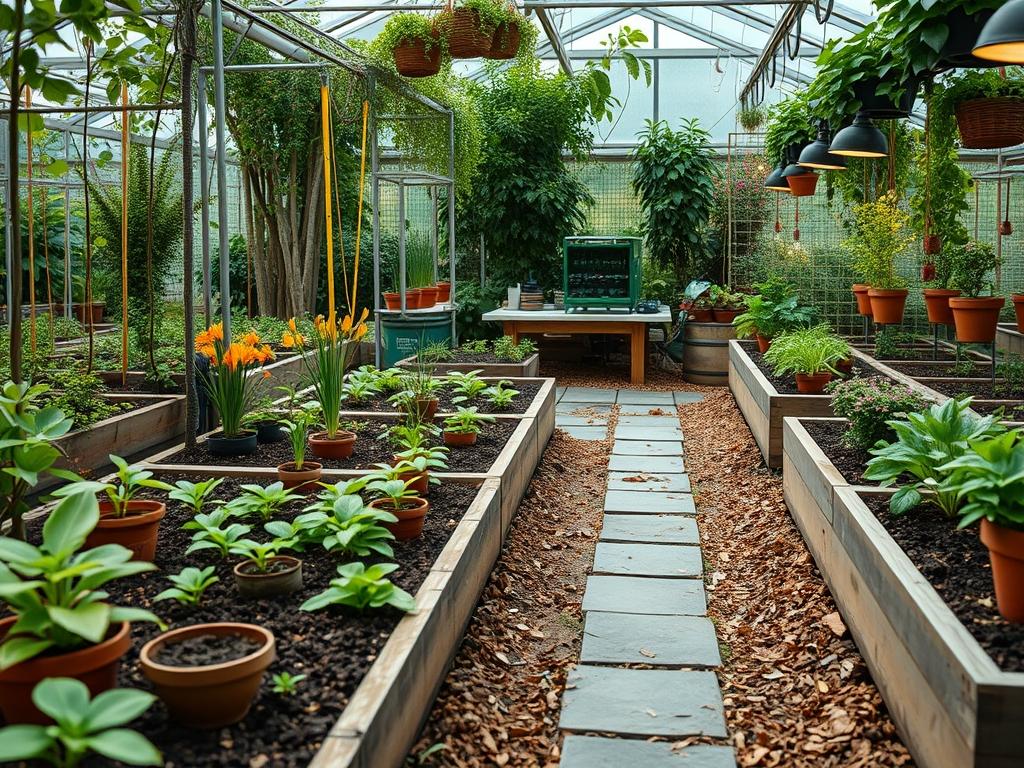
Most homeowners view their landscape through a singular lens of daytime aesthetics, yet the most sophisticated properties realize their full potential only after the sun sets. Integrating Smart Garden Lighting Scenes into a professional landscape design is not merely an exercise in visibility; it is a strategic orchestration of shadow, color, and focus that extends the functionality of outdoor living environments. A well-executed lighting plan enhances curb appeal, increases safety on walkways, and allows for the seamless transition of social gatherings from the interior to the exterior. Achieving this balance requires a deep understanding of how light interacts with vertical structures, plant textures, and different weather conditions. From the humid coastal regions to the dry heat of the interior, the choice of fixtures and their placement must be dictated by both the botanical requirements and the desired atmospheric effect.
The challenge lies in avoiding the over-lit look of a commercial parking lot while ensuring that key architectural features and specimen plants are not lost in the darkness. Smart technology provides a level of control that traditional flip-switches cannot match. By utilizing zoned systems and dimmable LEDs, a designer can create distinct moods for different occasions, such as a subtle glow for a private dinner or a brighter, more vibrant setting for a large garden party. This approach also addresses environmental concerns by reducing light pollution and energy consumption through the use of astronomical timers that adjust based on the current sunset times in your specific geographic location.
Landscape Design Principles
Effective landscaping begins with symmetry and the establishment of clear focal points that guide the eye through the space. When planning Smart Garden Lighting Scenes, consider the three-dimensional volume of the yard. Use elevation layers to create depth; this involves lighting the foreground, midground, and background at varying intensities. For instance, a low-intensity wash on a retaining wall in the background provides a sense of boundary, while a more focused spotlight on an ornamental tree in the midground creates a dramatic center of gravity.
Visual balance is critical to prevent the eye from becoming overwhelmed by harsh contrasts. Instead of saturating the entire garden with light, focus on the relationship between light and void. Walkways should be illuminated with staggered path lights to avoid the “runway effect,” which can look clinical and uninviting. Furthermore, irrigation planning must happen concurrently with lighting design. Water and electricity are naturally incompatible, so conduits for low-voltage wiring should be mapped alongside PVC piping and drip lines to prevent accidental punctures during future maintenance. By coordinating these subterranean systems, you ensure a clean finish where no cables are visible, maintaining the pristine look of the turf and mulch beds.
Plant and Material Selection
The success of a lighting scene often depends on the reflective qualities and textures of the vegetation chosen. Highly textured leaves catch light differently than smooth ones, and the color of the foliage can either absorb or amplify various light spectrums. Below is a guide for selecting plants that thrive in a curated, lit environment.
| Plant Type | Sun Exposure | Soil Needs | Water Demand | Growth Speed | Maintenance Level |
| :— | :— | :— | :— | :— | :— |
| Buxus sempervirens | Full Sun/Part Shade | Well-drained | Moderate | Slow | Medium |
| Acer palmatum | Part Shade | Acidic/Moist | High | Moderate | High |
| Lavandula angustifolia | Full Sun | Sandy/Gritty | Low | Moderate | Low |
| Miscanthus sinensis | Full Sun | Adaptable | Moderate | Fast | Low |
| Olea europaea | Full Sun | Deep/Dry | Very Low | Slow | Medium |
| Hydrangea macrophylla | Part Shade | Rich/Humus | High | Moderate | High |
When selecting hardscape materials to complement these plants, look for non-reflective surfaces like river rock, decomposed granite, or slate. These materials provide a naturalistic base that grounds the lighting scenes. Conversely, light-colored travertine or limestone pavers can be used strategically to bounce light upward into nearby tree canopies, creating a soft, ethereal glow known as “moonlighting.”
Implementation Strategy
The transition from design to reality requires a systematic approach to grading and site preparation. Before any fixtures are installed, the land must be properly sloped to ensure drainage moves away from both the home foundation and the electrical hubs. A 2% slope is generally recommended for lawn areas to prevent pooling. Once the grading is finalized, map out the locations for the smart hub and low-voltage transformer. These units should be housed in a weather-protected area but remain accessible for occasional resets.
Begin the installation by trenching for the main power lines. Use 12/2 low-voltage wire for most runs, as it handles voltage drop effectively over longer distances. When placing fixtures like up-lights or well-lights, consider the mature size of the plant rather than its current size. A common mistake is placing a light too close to the trunk of a young Acer palmatum, only to have the light blocked by heavy branch growth two years later. After the fixtures are wired, apply a 6-inch layer of mulch or organic compost to the beds. This helps retain moisture for the plants and hides any shallow-buried wires. Finally, install steel or poly edging to create a crisp border between the planting beds and the turf, which prevents grass from encroaching on the lighting fixtures and minimizes the risk of damage from string trimmers.
Common Landscaping Failures
One of the most frequent errors in garden planning is the failure to address drainage mistakes. If water collects around a light fixture, even a high-quality “waterproof” unit will eventually fail due to hydrostatic pressure. Properly installed French drains or catch basins are essential in low-lying areas of the garden. Another issue is root overcrowding. When plants are placed too closely together to achieve an “instant” look, they eventually compete for nutrients and block the intended light paths, turning a sophisticated lighting scene into a cluttered mess of shadows.
Soil compaction is a silent killer of both plants and electrical infrastructure. During the construction phase, heavy machinery can crush the soil structure, preventing oxygen from reaching the roots and potentially severing buried cables. Always aerate the soil before the final planting phase. Additionally, irrigation inefficiencies can cause significant damage. Over-spraying from traditional high-arc sprinklers can lead to mineral buildup on light lenses, clouding the output over time. It is preferable to use sub-surface drip irrigation which delivers water directly to the roots and keeps the lighting equipment dry.
Seasonal Maintenance
Landscape management is a year-round commitment. In the spring, focus on pruning and cleaning. Trim back any winter die-back that might be obstructing light fixtures and clear away debris from the lenses using a soft cloth and vinegar solution. This is also the time to test the smart controller and update any software to ensure the scheduling functions are accurate for the longer days ahead.
During the summer, the primary concern is water management. Monitor the irrigation system for leaks and ensure that the heat is not stressing the specimen trees that serve as your primary lighting targets. In the autumn, the challenge is leaf litter. Regularly clear fallen leaves from well-lights and path lights, as decaying organic matter can trap heat and shorten the lifespan of LED bulbs. Finally, in the winter, adjust your Smart Garden Lighting Scenes to account for the lack of foliage. You may need to dim certain lights that look too harsh against bare branches or increase the warmth of the light color (dropping from 3000K to 2700K) to make the space feel more inviting during the cold months.
Professional Landscaping FAQ
How do I choose the right brightness for garden lights?
Focus on lumens rather than wattage. Use 200 to 300 lumens for paths and 400 to 800 lumens for large trees. Always prioritize a layered approach with lower intensity to avoid glare and create a more natural, professional atmosphere.
Can I integrate old lighting into a smart system?
Yes, most existing low-voltage systems can be upgraded. By replacing a standard transformer with a smart transformer or adding a smart plug-in controller, you can gain zone control and scheduling capabilities without rewiring your entire garden or replacing every fixture.
What is the best way to hide outdoor wiring?
Bury wires at least six inches deep in planting beds and use PVC conduit under permanent structures like walkways. Cover the remaining surface with a generous layer of mulch or decorative stone to ensure a clean, professional appearance.
How does lighting affect nocturnal garden health?
Over-lighting can disrupt the natural cycles of pollinators and local wildlife. Use warm-toned LEDs (2700K or lower) and smart timers to ensure lights are dimmed or turned off during the late night hours, protecting the local ecosystem while maintaining safety.
What are the benefits of zoned garden lighting?
Zoning allows you to control specific areas of the property independently. You can keep pathway lights on for safety while turning off accent lights in the garden beds, or dim the patio lights for a movie night while keeping the perimeter secure.