
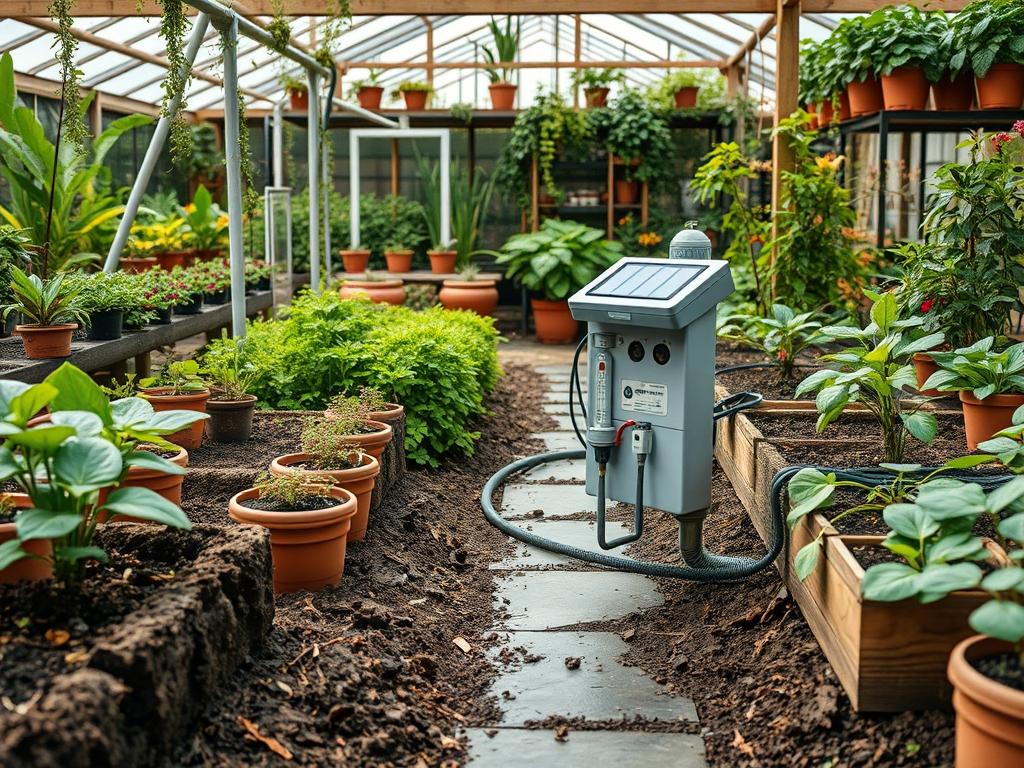
Effective landscape architecture relies on the seamless integration of aesthetics and utility. When we approach an outdoor environment, we are not just looking at where to plant a tree, we are designing a living system that must sustain itself across changing seasons and fluctuating weather patterns. A primary challenge in modern residential design is the management of water resources while maintaining high curb appeal and functionality. The introduction of Solar Powered Garden Timers has revolutionized this aspect of the field. These devices allow for precise irrigation control without the complex logistical burden of hardwiring electrical lines through established turf or under expensive hardscaping. By leveraging renewable energy, a landscape architect can ensure that the hydration needs of various botanical zones are met with surgical precision, fostering a resilient ecosystem that thrives even in the face of restrictive local water ordinances.
Reliable irrigation is the silent engine of a successful garden. Without it, the most expensive Native Plants and specimen trees will fail to establish, leading to a loss of investment and a decline in property value. Modern outdoor functionality goals focus on low-impact, high-efficiency systems. Selecting a timer that runs on solar power eliminates the need for battery replacements or trenching across a driveway to reach a power source. This degree of freedom allows us to place the control center exactly where the sunlight is most abundant, ensuring the internal capacitor stays charged while providing optimal water delivery to remote corners of the property.
Landscape Design Principles
In the realm of professional landscape design, balance and symmetry dictate the visual flow of a space. We often utilize Symmetry to create a sense of order, particularly in formal entryways or parterre gardens. If a hedge row on the left is receiving more water than the one on the right because of manual watering inconsistencies, the visual balance is shattered. Solar Powered Garden Timers solve this by automating identical schedules across mirrored zones. This ensures that the vertical growth and foliage density remain uniform, preserving the intended architectural lines of the garden.
Focal points and elevation layers also play a critical role in how we plan irrigation. A specimen Magnolia grandiflora positioned on a structural Retaining Wall or a raised mound requires a different hydration profile than a flat expanse of Cynodon dactylon (Bermuda grass). Water tends to move downward through the soil profile due to gravity, meaning higher elevations often dry out faster than the base of a slope. Sophisticated timers allow designers to create specific irrigation groups, or hydrozones, that account for these topographical variances. By grouping plants with similar water requirements and using automated controllers, we prevent the common issue of over-saturating the low points of the yard while leaving high-elevation focal points parched.
Furthermore, the integration of walkways and hardscaping requires careful planning. Traditional wired timers often force designers to run conduits under stone paths or concrete patios, which increases labor costs and introduces potential failure points. Solar alternatives allow the controller to be mounted to a fence post or a discreet stake within a flower bed, keeping the infrastructure invisible and the walkways unobstructed. This maintains the clean lines of the design while ensuring that the transition between functional zones and living green space remains fluid.
Plant and Material Selection
Selecting the right botanical palette is essential for a low-maintenance landscape. The table below outlines several common species and their environmental requirements, which should be factored into your irrigation programming.
| Plant Type | Sun Exposure | Soil Needs | Water Demand | Growth Speed | Maintenance Level |
| :— | :— | :— | :— | :— | :— |
| Quercus virginiana (Live Oak) | Full Sun | Well-drained | Moderate | Slow | Low |
| Lavandula angustifolia (Lavender) | Full Sun | Sandy/Alkaline | Low | Moderate | Low |
| Hydrangea macrophylla | Partial Shade | Rich/Loamy | High | Fast | Moderate |
| Sedum spectabile (Autumn Joy) | Full Sun | Poor/Dry | Low | Moderate | Low |
| Acer palmatum (Japanese Maple) | Partial Shade | Moist/Acidic | Moderate | Slow | Moderate |
| Buxus sempervirens (Boxwood) | Full to Part Sun | Well-drained | Moderate | Slow | High (Pruning) |
When installing a system, the materials used are just as important as the plants. High-quality Polyethylene Tubing should be used for main lines, while Drip Emitters or Soaker Hoses are preferred for targeted delivery. Using a Solar Powered Garden Timer in conjunction with a Rain Sensor can further optimize water usage, shutting the system down during natural precipitation events to prevent root rot.
Implementation Strategy
The successful installation of an automated irrigation system starts with a comprehensive site analysis. Begin by measuring the total area and identifying the location of your primary water source, usually an outdoor Hose Bib. Once the source is identified, determine the Static Water Pressure using a pressure gauge. Most residential systems operate between 40 PSI and 60 PSI. If your pressure is too high, you may need a pressure regulator to prevent the Drip Emitters from popping off the lines.
Next, address the Grading and Drainage of the site. Use a Level or transit to identify low spots where water might pool. Proper grading ensures that excess water moves away from the foundation of the home and toward a designated drainage area or rain garden. Once the landscape is graded, lay out your Hardscaping elements such as gravel paths or stone borders. These act as permanent boundaries for your planting beds.
When you are ready to install the Solar Powered Garden Timer, mount it in a location that receives at least 6 hours of direct sunlight per day. Avoid placing it under the heavy canopy of an Evergreen Tree or in the shadow of a chimney. Use Landscape Staples to secure the tubing to the ground before covering it with a layer of Hardwood Mulch. A mulch depth of 3 inches is standard for moisture retention and weed suppression. Always perform a “dry run” of the timer to check for leaks at the threaded connections and ensure that each emitter is providing the correct flow rate to the base of the plants.
Common Landscaping Failures
One of the most frequent mistakes in residential landscaping is the neglect of soil physics. Soil Compaction is a silent killer; it occurs when heavy foot traffic or construction equipment compresses the earth, eliminating the air pockets necessary for root respiration. Even the best irrigation timer cannot save a plant if the water cannot penetrate the compacted soil. Always aerate the ground and incorporate Organic Compost before finishing the landscape.
Another common failure is Root Overcrowding. Designers often plant for “instant impact,” placing shrubs too close together. As the plants mature, they compete for the same water and nutrients, leading to stunted growth or fungal infections due to poor air circulation. Ensure you research the mature width of your species. Similarly, improper Drainage can lead to anaerobic soil conditions. If you notice standing water more than 24 hours after a heavy rain or an irrigation cycle, your site may require a French Drain or a specialized drainage pipe to move the water.
Seasonal Maintenance
Landscape management is a year-round commitment. In the Spring, the focus is on system startup. Inspect the Solar Powered Garden Timer for any damage caused by winter pests and clean the solar panel with a soft cloth to ensure maximum charging efficiency. Flush the irrigation lines to remove any sediment that may have accumulated during the dormant season.
During the Summer, monitor the performance of your plants during peak heat. You may need to adjust the duration of the watering cycles on your timer to account for higher Evapotranspiration rates. Autumn is the time for transition. Reduce watering frequency as plants enter dormancy and apply a fresh layer of Mulch to insulate the roots against the coming cold.
In Winter, maintenance involves protection. In regions with freezing temperatures, it is vital to winterize the system. Disconnect the Solar Powered Garden Timer from the water source and store it indoors to prevent the internal valves from cracking. Drain the lines of all residual water using an air compressor if necessary to prevent pipe bursts.
Professional Landscaping FAQ
How much sunlight does a solar timer actually need?
Most high-quality units require approximately 6 to 8 hours of direct, unobstructed sunlight to maintain a full charge. If placed in deep shade, the battery may deplete, leading to a failure in the programmed irrigation schedule.
Can I run multiple zones off one solar timer?
Yes, several advanced models feature multi-outlet manifolds. This allows you to set independent schedules for different hydrozones, such as a high-water vegetable garden and a low-water succulent bed, all from a single solar-powered hub.
Do these timers work with rain barrels?
Many Solar Powered Garden Timers are designed for low-pressure systems and work excellently with gravity-fed rain barrels. Ensure you select a model specifically rated for zero-pressure or low-pressure operation to ensure the internal valve opens correctly.
What is the average lifespan of the internal battery?
The internal lithium-ion or NiMH battery typically lasts between 3 and 5 years. While the solar panel itself may last longer, the battery’s ability to hold a charge will eventually degrade, necessitating a unit replacement or battery swap.
Will the timer still work on cloudy days?
Yes, the internal battery stores enough energy to power the timer through several days of overcast weather. As long as the unit receives occasional direct light to top off the charge, the system will remain fully functional.