
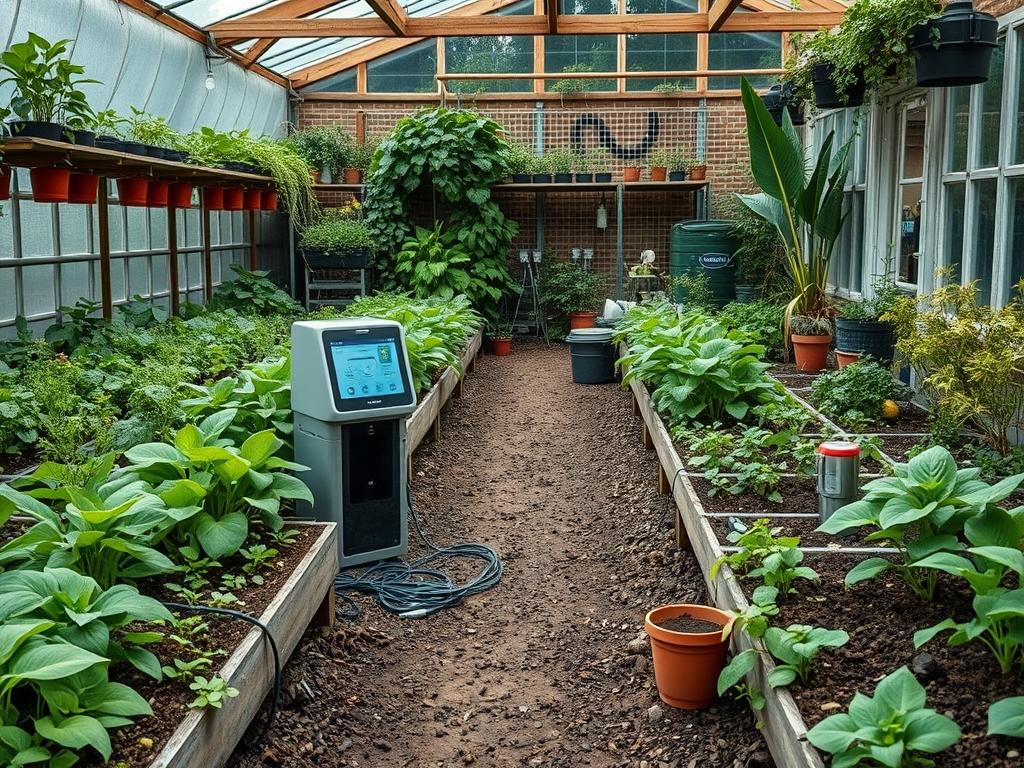
Modern landscape architecture represents the delicate bridge between wild nature and structured residential living. For many homeowners, the primary challenge involves reconciling aesthetic desires with the harsh realities of local microclimates and soil conditions. Achieving high curb appeal is rarely about a single weekend project; rather, it is the result of a comprehensive outdoor environment strategy that prioritizes functionality and long-term sustainability. The rise of sophisticated outdoor technology has introduced a new layer to this discipline. A successful smart garden device setup requires more than just hardware. It demands an integrated design where sensors, automated valves, and lighting systems coexist with physical elements like Retaining Walls and Native Grasses. By viewing the garden as an ecosystem of both biological and digital components, we can create spaces that are resilient, water-efficient, and visually stunning.
Landscape Design Principles
Professional garden planning begins with the concept of visual balance. Symmetry provides a sense of formality and order, often achieved by mirroring plantings on either side of a central Stone Walkway. However, asymmetrical designs can be equally compelling if the “visual weight” is distributed correctly. For instance, a large Oak Tree on one side of a property can be balanced by a dense cluster of Evergreen Shrubs and a significant Boulders grouping on the other. Within this framework, focal points serve as the anchors of the design. These might be structural, such as a custom Pergola, or biological, such as a vibrant specimen of Japanese Maple.
Elevation layers are perhaps the most overlooked aspect of site planning. A flat yard often feels stagnant. By introducing intentional changes in grade through the use of Terraced Planters or minor Hills, you create depth and lead the eye through the space. This is also where irrigation planning becomes critical. A smart garden device setup must account for these elevation changes; water naturally pools at the lowest points, meaning moisture sensors placed at the top of a slope will report significantly different data than those at the base. Effective design ensures that Irrigation Bubblers and Drip Lines are zoned according to these hydro-zones, preventing the common mistake of overwatering the bottom of a hill while the top remains parched.
Plant and Material Selection
The following table outlines high-performance selections that integrate well with automated management systems.
| Plant Type | Sun Exposure | Soil Needs | Water Demand | Growth Speed | Maintenance Level |
| :— | :— | :— | :— | :— | :— |
| Lavender | Full Sun | Well-drained, Sandy | Low | Moderate | Low |
| Boxwood | Partial to Full Sun | Loamy, Neutral pH | Moderate | Slow | Medium |
| Mexican Feather Grass | Full Sun | Poor to Average | Very Low | Fast | Low |
| Hostas | Full Shade | Moisture-rich, Organic | High | Moderate | Low |
| River Birch | Full to Partial Sun | Moist, Acidic | High | Fast | Medium |
| Catmint | Full Sun | Average | Low | Fast | Low |
When selecting materials for hardscaping, durability should be the priority. Pavers should be set on a base of Crushed Limestone and Polymeric Sand to prevent shifting and weed growth. For mulching, Double-shredded Hardwood Mulch is preferred over lighter materials that might wash away during heavy rain, especially if you have installed Ground-level Soil Sensors that require a stable environment to provide accurate data.
Implementation Strategy
The transition from a design on paper to a physical landscape requires a systematic approach. The first stage is always site preparation, which involves grading the land to ensure water flows away from the home foundation. Use a Transit Level or a simple Spirit Level with a Straight Edge to verify a minimum 2 percent slope. Once the grade is established, the layout of hardscaping elements like Gravel Paths or Concrete Patios should be marked using Layout String and Marking Paint.
Before planting, focus on the infrastructure of your smart garden device setup. It is far easier to bury PVC Conduit for electrical lines and Low-voltage Wiring for Smart Controllers before the garden is finished. Dig a Trench at least 12 inches deep for water lines and 6 inches for lighting wires to protect them from accidental damage during future aeration or edging.
Edging is the secret to a professional finish. Use Steel Edging or Deep-profile Plastic Edging to create a crisp line between the Turfgrass and the planting beds. This prevents invasive grass roots from creeping into your Mulch, and it provides a physical barrier that protects Irrigation Emitters from the blades of a Lawn Mower. When installing plants, the hole should be twice as wide as the root ball but no deeper. For many species, such as the Red Oak, planting too deep can lead to stem-girdling roots and eventual tree death. Finish the installation by applying a 3-inch layer of mulch, making sure to keep it away from the base of the plant stems to avoid moisture-related rot.
Common Landscaping Failures
The most frequent error in modern landscaping is a failure to address drainage properly. When water is allowed to stagnate, it creates anaerobic soil conditions that kill even the heartiest plants. This is often caused by soil compaction during construction; the heavy weight of a Bobcat or Skid Steer can crush the air pockets in the soil, turning clay into a substance as hard as concrete. To fix this, use a Core Aerator or incorporate Organic Compost into the top 8 inches of the soil profile.
Root overcrowding is another common pitfall. Homeowners often buy small plants and place them too close together for immediate impact, forgetting that a Leyland Cypress can grow to a width of 15 feet. Within five years, these plants compete for nutrients and light, leading to a thin, sickly appearance. Furthermore, improper spacing interferes with a smart garden device setup by blocking the signals of Wireless Bridges or obscuring the view of Smart Security Cameras.
Finally, irrigation inefficiencies are a major source of landscape failure. Many systems are set to a fixed timer that does not account for rainfall or humidity. In a professional setup, a Smart Rain Sensor or a Weather-based Controller adjust the water output based on real-time data. Without this technology, the garden is susceptible to “leaching,” where excessive water washes away necessary nitrogen and minerals from the soil.
Seasonal Maintenance
Seasonal care ensures that your investment in both plants and technology remains viable over the decades.
Spring: This is the season for renewal. Begin by testing the soil pH using a Soil Test Kit. Prune dead wood from Summer-blooming Shrubs and apply a Pre-emergent Herbicide to prevent weed seeds from germinating. Check all Drip Irrigation Emmiters for clogs and replace the batteries in any Wireless Sensors.
Summer: The focus shifts to water management. In the heat of July, deep watering is more effective than frequent shallow watering. Aim for 1 inch of water per week for the lawn. Monitor for pests like Aphids or Japanese Beetles using Hand Pruners to remove infested foliage immediately. Refresh Mulch if it has settled to less than 2 inches.
Autumn: This is the ideal time for planting Deciduous Trees and Perennials as the cooler air and warm soil encourage root growth without the stress of summer heat. Rake leaves to prevent them from smothering the grass or clogging Drainage Grates. This is also when you should perform a final application of High-potash Fertilizer to strengthen plants for the winter.
Winter: In colder climates, winterization is mandatory. Drain all Irrigation Lines and blow them out with an Air Compressor to prevent pipes from bursting. If you use Smart Valves, bring them indoors or wrap them in Insulation Tape. Use Burlap Wraps to protect sensitive evergreens from salt spray or heavy snow loads.
Professional Landscaping FAQ
How do I choose the right smart controller?
Select a controller that offers multi zone support and local weather station integration. Ensure it uses a communication protocol compatible with your home network. Look for hardware with a weather resistant enclosure to protect the internal circuitry from moisture and UV damage.
What is the best way to improve soil drainage?
Incorporate organic matter like leaf mold or compost to improve structure. For severe cases, install a French Drain using Perforated Pipe and Drainage Gravel to redirect water toward a safe discharge point or a dedicated Rain Garden at the property edge.
Can I install my own smart irrigation valves?
Yes, provided you have access to the main water line and basic plumbing tools like a Pipe Cutter. Ensure you install a Backflow Preventer to keep garden water from entering your potable supply. Test each connection for leaks under full pressure.
Why are my native plants struggling to thrive?
Even native species require a period of establishment. Ensure they are planted in a location that mimics their natural habitat regarding sun and soil moisture. Avoid over fertilizing, as many native plants are adapted to low nutrient environments and can suffer from excessive nitrogen.
How deep should I bury my smart garden cables?
Low voltage cables should be buried at least 6 inches deep to avoid damage from garden tools. If you are running high voltage power for a Pond Pump or heavy lighting, the National Electrical Code usually requires a depth of 18 inches.