
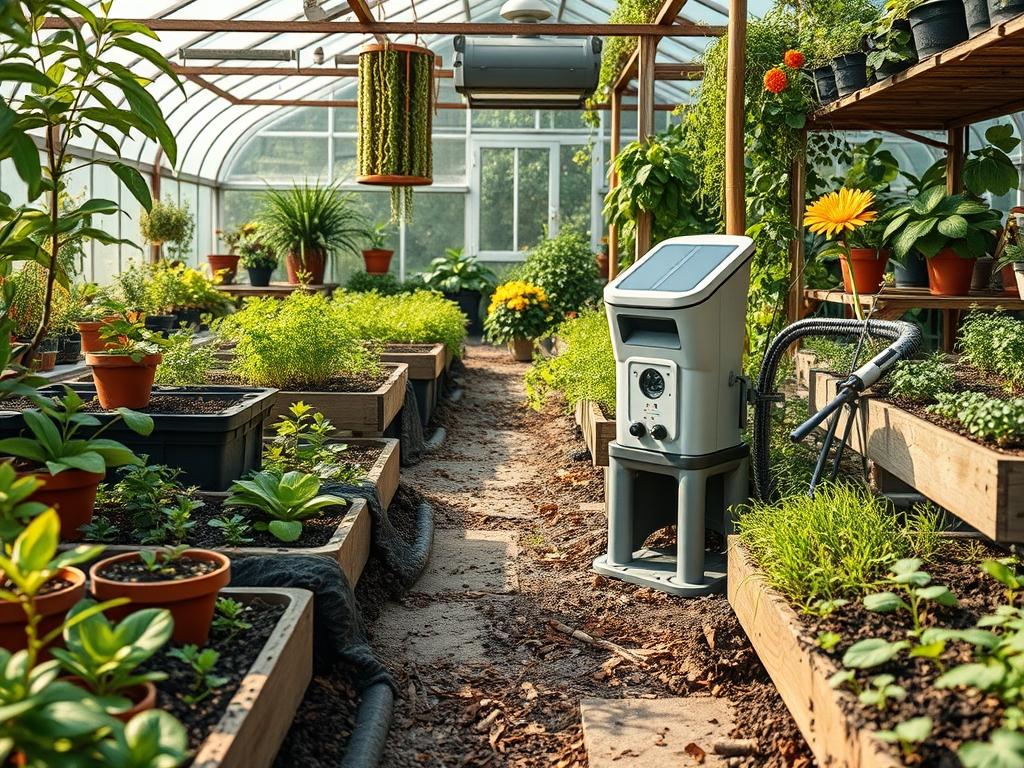
Designing a modern landscape requires a delicate balance between aesthetic elegance and functional safety. Homeowners often struggle with the paradox of wanting a lush, secluded sanctuary while simultaneously maintaining a clear, secure perimeter. Traditional security systems frequently disrupt this harmony, requiring invasive trenching for wires that can damage established root systems and disrupt the soil profile. However, the integration of Solar Powered Garden Security offers a sophisticated solution that preserves the integrity of the landscape design while providing comprehensive coverage. By utilizing the natural energy of the sun, we can place motion sensors, LED floodlights, and high-definition cameras in the most strategic locations without the constraints of a power grid. This approach allows for a “stealth” security layer where technology is woven into the greenery, ensuring that your outdoor living space remains both beautiful and protected against intruders.
The primary landscaping challenge often involves managing heavy foliage that creates blind spots. A well-planned garden should account for these vulnerabilities by using the principles of defensible space. This means selecting plants that offer privacy without providing cover for unauthorized access. Curb appeal does not have to be sacrificed for safety; rather, the two can enhance one another. High-quality Solar Powered Garden Security units now come in sleek, architectural finishes like brushed aluminum or matte black polymer, which complement modern hardscaping materials such as pavers and natural stone walls. When we plan for light and visibility, we are not just designing for the eyes of the owner, but also for the deterrent effect on those who might observe the property from the street.
Landscape Design Principles
Effective landscape design relies on the core concepts of symmetry and visual balance to guide the eye and create a sense of order. When placing security elements, symmetry is your greatest ally. Installing matching solar bollard lights along a flagstone walkway creates a rhythmic progression that feels intentional rather than utilitarian. These lights should be positioned at regular 5 foot intervals to ensure a continuous wash of light across the ground plane, eliminating dark pockets where someone could hide. Focal points, such as a specimen tree or a sculptural water feature, can also serve as mounting platforms for discreet solar cameras, allowing the technology to blend into the vertical architecture of the garden.
Elevation layers are critical for both horticultural health and security coverage. We categorize the landscape into three tiers: the canopy, the mid-story, and the ground cover. Security sensors should ideally be placed in the mid-story, approximately 6 to 8 feet above the ground, to maximize their field of view while remaining out of the immediate reach of tampering. This elevation strategy also prevents pets or small wildlife from constantly triggering false alarms. Furthermore, irrigation planning must account for these electronic components. Even though most high-end solar units are rated IP65 or higher for water resistance, they should not be placed directly in the line of high-pressure sprinkler heads or near drainage swales where moisture can pool and degrade the mounting hardware over time.
Plant and Material Selection
The following table provides a selection of plants that work harmoniously with solar security systems, providing structure without obstructing the path of the sun to the charging panels.
| Plant Type | Sun Exposure | Soil Needs | Water Demand | Growth Speed | Maintenance Level |
| :— | :— | :— | :— | :— | :— |
| Boxwood (Buxus) | Full Sun to Shade | Well-Drained | Moderate | Slow | High (Pruning) |
| Switchgrass | Full Sun | Adaptable | Low | Fast | Low |
| Japanese Maple | Partial Shade | Loamy/Acidic | Moderate | Slow to Medium | Moderate |
| Dwarf Yaupon Holly | Full Sun/Part Shade | Sandy/Clay | Low | Medium | Low |
| Creeping Thyme | Full Sun | Gritty/Poor | Low | Medium | Very Low |
| Lavender | Full Sun | Well-Drained | Low | Medium | Moderate |
When selecting materials for the installation of security units, always prioritize durability and weather resistance. Use stainless steel fasteners and heavy-duty mounting brackets to attach units to retaining walls or pergolas. For ground-mounted systems, a base of crushed limestone or pea gravel can prevent soil splash-back onto the photovoltaic cells, ensuring they remain clean and efficient throughout the season.
Implementation Strategy
Implementing a professional-grade layout begins with a comprehensive site survey to identify the solar potential of each zone. Use a solar pathfinder or a similar tool to track the sun’s trajectory during the winter months, when the arc is lowest. This ensures that your Solar Powered Garden Security devices receive at least 6 hours of direct light daily, even when the days are shortest. Once the locations are marked with landscaping stakes, begin the grading process. Ensure the ground slopes away from any electronic mounting posts at a 2 percent grade to prevent water accumulation at the base.
Next, focus on the hardscaping integration. If you are installing security cameras near a retaining wall, use a hammer drill with a masonry bit to create clean pilot holes. Insert plastic anchors to secure the mounts firmly against the stone. For garden beds, use treated timber or steel edging to define the perimeter around the sensor. Apply a 3 inch layer of organic cedar mulch around the base of the plant material, but keep it clear of the solar post by at least 4 inches to discourage insect nesting and rot. Finally, sync the devices to your network while they are at ground level before performing the final mounting at the desired elevation.
Common Landscaping Failures
One of the most frequent mistakes in residential landscaping is improper drainage management. When water is directed toward the foundation or allowed to sit in low spots, it creates a humid microclimate that can shorten the lifespan of electronic components and lead to fungal issues in turfgrass. Another common failure is root overcrowding. Planting a Leyland Cypress too close to a security mast might look good for the first year, but within three seasons, the aggressive root system can heave the mounting post, causing the camera’s field of view to shift or fail entirely.
Improper spacing is also a major culprit in security inefficiency. If plants are placed too densely, they create “dead zones” where PIR sensors cannot penetrate the foliage. Soil compaction, often caused by heavy foot traffic during the installation of hardscape elements, prevents oxygen from reaching plant roots and causes runoff issues. Always use a mechanical aerator or a garden fork to loosen the soil in planting zones after construction is complete. Lastly, many homeowners fail to account for the “growth leap” of shrubs. A small Juniper planted today may block a solar panel within eighteen months, rendering the security device useless.
Seasonal Maintenance
Seasonal care is the hallmark of a professional landscape architect’s plan. In the spring, focus on pruning the previous year’s growth to clear any obstructions from lenses and sensors. Use a bypass pruner for clean cuts on soft stems and a lopper for larger branches. This is also the time to check the integrity of all mounting hardware after the winter freeze-thaw cycles. Ensure that no screws have loosened and that the silicone seals remain intact.
During the summer, the primary task is cleaning. Dust, pollen, and debris can settle on the solar panels, reducing their efficiency by as much as 30 percent. Use a soft microfiber cloth and distilled water to wipe the panels clean. In the autumn, leaf removal is paramount. Wet leaves stuck to a sensor or a solar cell can cause the battery to drain prematurely. Finally, in the winter, keep the panels clear of snow and ice. Adjust the angle of the panels if possible to a more vertical orientation to catch the low winter sun and allow snow to slide off naturally.
Professional Landscaping FAQ
How does solar security affect my property value?
Well-integrated Solar Powered Garden Security enhances curb appeal by eliminating messy wires. Prospective buyers view integrated technology as a premium upgrade, especially when combined with a professionally designed hardscape and mature native plants that require minimal utility input.
Can I install these systems in a shaded backyard?
Yes, but you must use units with remote solar panels. You can mount the panel on a south-facing roof or a sunny fence line and run a low-voltage wire to the camera located in the shaded garden area.
What is the best mulch for security areas?
Pine bark nuggets or shredded cedar are ideal. They resist washing away during heavy rains and provide a stable surface around bollard lights. Avoid light materials like cocoa hulls that might blow onto the sensors during high winds.
How do I prevent “false triggers” from moving branches?
Focus on the 3-foot rule. Keep all ornamental grasses and flexible branches at least 3 feet away from the motion sensor’s primary field of view. Use stiff-branched shrubs like Boxwood near the sensors to minimize wind-induced movement.
How long do the batteries in these units typically last?
High-quality Lithium-iron phosphate (LiFePO4) batteries used in professional solar security systems generally last between 3 to 5 years. Regular cleaning of the photovoltaic surface will extend this lifespan by ensuring consistent, deep charging cycles.