
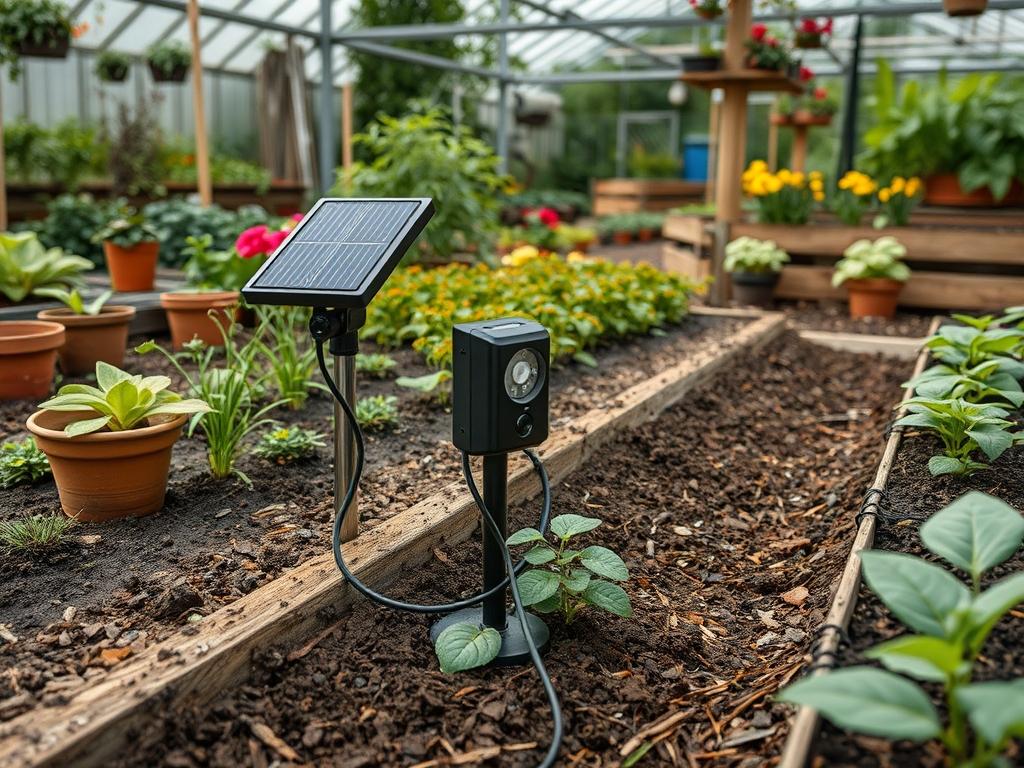
Modern landscape architecture transcends the simple arrangement of flora; it is a sophisticated orchestration of space, light, and movement that defines how we interact with the natural world after sunset. The transition from day to night often renders a meticulously designed garden invisible, yet the integration of Solar Powered Motion Sensors allows for a dynamic response to human presence. Professional designers no longer view lighting as a static utility. Instead, we see it as a programmable layer that enhances curb appeal and safety while respecting the constraints of the local climate. Whether you are navigating a humid coastal environment or a dry mountainous region, the primary landscaping challenge remains the same: how to provide functional visibility without saturating the environment in artificial glare. By using intelligent sensors, a designer can ensure that light only exists where and when it is needed, preserving the integrity of the “dark sky” while guiding visitors through a curated outdoor experience.
Landscape Design Principles
Effective garden planning relies on fundamental principles such as symmetry, focal points, and elevation layers. When we introduce Solar Powered Motion Sensors into a design, we are essentially adding a fourth dimension, which is time-based interaction. Symmetry is often achieved through the mirrored placement of Boxwood or Stone Pedestals along a central axis. In this context, sensors can be hidden within the foliage to activate twin spotlights, reinforcing the architectural balance as one approaches the home. Focal points, such as a large Japanese Maple or a custom Water Feature, benefit from motion-based illumination because it creates a sense of discovery. As a guest walks toward a secluded bench, the sudden, soft glow of a light hidden in the canopy transforms a dark corner into a destination.
Elevation layers are equally critical. A professional landscape plan utilizes a mix of ground covers, mid-stature shrubs, and overstory trees to create depth. By placing sensors at varying heights, you can trigger different layers of light. For example, a low-mounted sensor near a Retaining Wall might activate path lights, while a sensor mounted at Six Feet on a fence post might trigger a broader wash of light across the lawn. This tiered approach prevents the “flat” look common in poorly planned yards. Furthermore, the placement of Walkways dictates the flow of traffic. Using Crushed Granite or Flagstone for paths provides a reflective surface that maximizes the efficiency of solar-powered units, ensuring that even a low lumen output provides sufficient guidance.
Plant and Material Selection
The following table outlines high-performance selections that complement a technologically integrated landscape. These plants were chosen for their structural qualities, which interact beautifully with motion-activated lighting.
| Plant Type | Sun Exposure | Soil Needs | Water Demand | Growth Speed | Maintenance Level |
| :— | :— | :— | :— | :— | :— |
| English Lavender | Full Sun | Well-drained | Low | Moderate | Low |
| Silver Grass | Full Sun | Loamy/Sandy | Moderate | Fast | Moderate |
| Hostas | Partial Shade | Rich/Moist | Moderate | Moderate | Low |
| Blue Star Creeper | Sun to Part Shade | Moist/Well-drained | Moderate | Fast | Moderate |
| Oakleaf Hydrangea | Part Shade | Acidic/Moist | High | Moderate | Medium |
| Dwarf Alberta Spruce | Full Sun | Well-drained | Moderate | Slow | Low |
Implementation Strategy
Implementing a professional garden layout requires more than just digging holes; it involves a systematic approach to site preparation. Begin with a comprehensive survey of the land. Use Marking Paint to outline the footprint of new Hardscaping elements and Planting Beds. The first physical step is Grading. You must ensure that the land slopes away from your home foundation at a minimum of a Two Percent Grade to prevent water accumulation. If your site has significant elevation changes, consider installing a Redwood Retaining Wall or a Dry Creek Bed to manage runoff effectively. These structural elements also serve as the perfect mounting points for Solar Powered Motion Sensors.
Once the skeleton of the garden is established, focus on Edging. Use Steel Edging or Paver Restraints to create crisp boundaries between the lawn and the mulch beds. This prevents grass from encroaching on your sensors and hidden lighting fixtures. When it is time to install the plants, verify the spacing. A common mistake is planting for the current size rather than the mature width. Dig holes that are twice as wide as the root ball and just as deep. After planting, apply a Three-inch Layer of Cedar Mulch to retain moisture and suppress weeds. Finally, position your Solar Powered Motion Sensors in areas where they receive at least Six Hours of direct sunlight daily to ensure the internal batteries remain charged. Test the detection zones by walking the paths at dusk; adjust the sensor heads to avoid “nuisance tripping” caused by swaying tree branches or passing cars.
Common Landscaping Failures
Many ambitious garden projects fail due to a lack of attention to site physics. Drainage is the most frequent culprit. When Solar Powered Motion Sensors are placed in low-lying areas without proper French Drains, the electronics can suffer from moisture ingress, even if they are rated for outdoor use. Furthermore, poor soil preparation leads to soil compaction. If you do not aerate the ground and incorporate Organic Compost, the roots of your Perennial Rye or Hedges will suffocate, leading to expensive plant loss.
Another frequent error is root overcrowding. Planting a Leyland Cypress too close to a Walkway or a Retaining Wall will eventually result in the roots heaving the hardscape, destroying your level surfaces. In terms of lighting, improper spacing of sensors is a major pitfall. If sensors are too close together, their light outputs can overlap and “blind” each other, causing the units to think it is still daylight. This prevents them from activating. Additionally, failing to consider the growth rate of shrubs often results in sensors being buried in foliage within two growing seasons, rendering them useless. Always maintain a “clear sightline” for the infrared eye of the device.
Seasonal Maintenance
A landscape is a living entity that requires seasonal adjustments to remain functional. In the Spring, your primary goal is cleanup. Remove dead stalks from Ornamental Grasses and check your Irrigation System for leaks or clogged emitters. This is also the time to wipe down the photovoltaic panels on your Solar Powered Motion Sensors. Dust, pollen, and bird droppings can reduce charging efficiency by as much as Thirty Percent.
During the Summer, focus on hydration and pruning. Use a Soaker Hose for deep watering of your Hydrangeas during heatwaves. Prune any fast-growing “water sprouts” or suckers that might be obstructing the view of your security sensors. In the Autumn, leaf management is the priority. Falling leaves can cover ground-mounted sensors or clog Drainage Grates. Clear the debris regularly to ensure the sensors can still “see” movement. Finally, in the Winter, protect your investments. In regions with heavy snow, use Driveway Markers to indicate the location of low-profile sensors so they are not crushed by snow shovels or plows. If you live in an area with extreme cold, check the battery health of your solar units, as freezing temperatures can temporarily reduce the storage capacity of lithium-ion cells.
Professional Landscaping FAQ
How high should I mount my motion sensors?
For residential paths, mount sensors between Three Feet and Five Feet high. This height range ensures the passive infrared beam captures human movement effectively while ignoring smaller animals that may trigger the light unnecessarily at ground level.
What is the best mulch for lighting visibility?
A Light-colored Hemlock or Double-ground Hardwood Mulch provides excellent contrast. Darker mulches absorb light; whereas, lighter materials reflect it, helping to illuminate the surroundings when your Solar Powered Motion Sensors activate the fixtures at night.
How do I prevent sensors from being triggered by wind?
Avoid pointing the sensor directly at high-motion plants like Bamboos or Willows. Use the built-in sensitivity dials to adjust the detection range, and ensures the mounting bracket is secured to a stable surface like a Fence Post.
Do solar sensors work in the shade?
They require indirect light to function, but for peak performance, the solar panel must be placed in a spot that gets several hours of sun. Many professional units allow the panel to be mounted separately from the sensor and light.
How often should I replace solar batteries?
Most rechargeable batteries in high-quality Solar Powered Motion Sensors last between Two and Three Years. If you notice the light becoming dim or failing to trigger after a full sunny day, it is time for a replacement.