
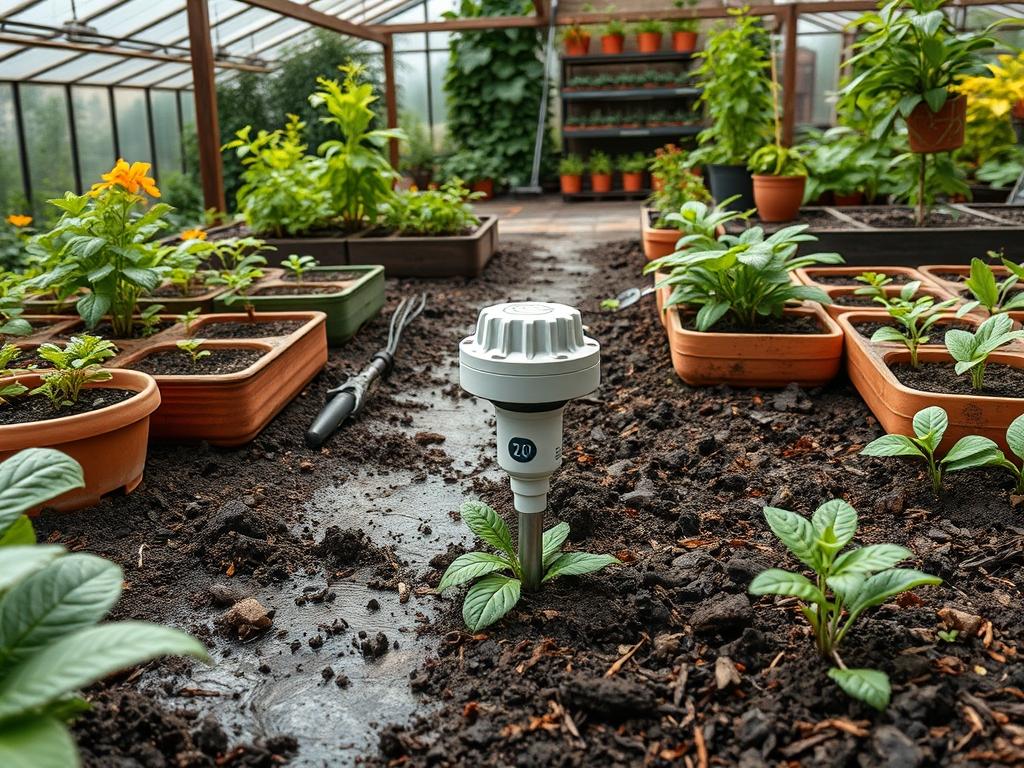
The challenge of maintaining a high-end landscape often lies in the invisible variables hidden beneath the surface of the turf. For homeowners and estate managers, achieving consistent curb appeal requires more than just weekly mowing and seasonal planting. It demands a scientific understanding of the subterranean environment where root systems interact with moisture, nutrients, and oxygen. Climate fluctuations can turn a thriving garden into a distressed patch of wilted foliage in a matter of days. This is precisely why Smart Garden Soil Sensors have become an indispensable tool for modern outdoor environment consultants. By providing real-time data on soil moisture, temperature, and electrical conductivity, these devices eliminate the guesswork that often leads to over-irrigation or nutrient leaching. A well-integrated sensor network ensures that the landscape design remains resilient, functional, and visually striking regardless of the weather patterns affecting the region.
Landscape Design Principles
Professional landscape architecture relies on a foundation of structural balance and biological health. Symmetry and focal points are the first elements a designer considers when drafting a site plan. A focal point might be a mature Japanese Maple or a custom natural stone fountain, but its visual impact is entirely dependent on the health of the surrounding flora. If the soil saturation levels are inconsistent across the property, the symmetry of a hedgerow or a parterre garden will fail as individual plants grow at different rates. Smart Garden Soil Sensors allow a designer to monitor these variations in real time, ensuring that the boxwood on the shaded North side of the property receives the same precise care as the ones in the scorching South-facing sun.
Elevation layers and topography play a significant role in how water moves through a site. When planning a landscape, we must account for the natural grade of the land. High points tend to dry out quickly, while low-lying areas become collection points for runoff. By strategically placing sensors at different elevation tiers, we can create a hydrozoning plan. Hydrozoning is the practice of grouping plants with similar water requirements together. This is complemented by a sophisticated irrigation plan that uses subterranean drip lines rather than standard spray heads. The use of Smart Garden Soil Sensors integrated with a Wi-Fi irrigation controller ensures that water is only applied when the volumetric water content falls below a specific threshold, typically 25 percent for most turf grasses.
Walkways and hardscaping elements like paver stones and retaining walls also influence soil health. These impermeable surfaces create thermal heat islands that can radiate heat into the nearby soil, causing rapid evaporation. A professional layout uses crushed granite or permeable pavers to allow for better gas exchange. The transition between hardscaping and softscaping requires a delicate balance of visual weight. Using boulders as anchors and ornamental grasses for texture creates a sense of movement. However, the installation of these heavy materials often leads to soil compaction, which restricts root growth. Monitoring the soil with sensors during and after the construction phase allows for the early detection of drainage issues caused by ground settling or compaction.
Plant and Material Selection
Selecting the right biological components is the most critical step in ensuring the longevity of a landscape. The following table provides a guide for common species used in professional designs and their specific requirements.
| Plant Type | Sun Exposure | Soil Needs | Water Demand | Growth Speed | Maintenance Level |
| :— | :— | :— | :— | :— | :— |
| Emerald Green Arborvitae | Full Sun | Well-drained | Moderate | Medium | Low |
| Hydrangea Macrophylla | Partial Shade | Rich Loam | High | Fast | Moderate |
| Lavender (Phenomenal) | Full Sun | Sandy/Gritty | Low | Fast | Low |
| Hostas (Blue Angel) | Full Shade | Organic/Moist | Moderate | Slow | Low |
| Dwarf Alberta Spruce | Full Sun | Slightly Acidic | Moderate | Very Slow | High |
| Fescue Turf Grass | Partial Sun | Loamy | High | Fast | High |
| Japanese Forest Grass | Partial Shade | Humus Rich | Moderate | Slow | Low |
The materials used for mulching and soil amendment are just as vital as the plants themselves. Using a 2 inch layer of hardwood mulch helps retain moisture and regulate soil temperature, while river rock can be used in high-flow areas to prevent erosion. For high-performance gardens, incorporating biochar or expanded shale into the soil profile can improve the structural integrity of the root zone, making it easier for Smart Garden Soil Sensors to provide accurate readings of the nutrient density and moisture levels.
Implementation Strategy
The successful execution of a landscape plan begins with proper site preparation. Grading is the first priority; the soil must be sloped at a minimum of a 2 percent grade away from any building foundations to ensure proper drainage. Once the rough grade is established, the installation of the irrigation system should follow. This is the ideal time to bury the communication wires for your Smart Garden Soil Sensors or to map out the signal strength for wireless units. Each sensor should be placed at a depth of 6 inches to 10 inches, which is where the majority of the active root zone resides for most ornamental shrubs and perennials.
Edging provides the clean lines necessary for high curb appeal. Using 14-gauge steel edging or poured concrete curbs prevents invasive grass species from encroaching into flower beds. After the edging is set, the planting phase begins. Each hole should be dug at least 2 times the width of the root ball to allow for the backfilling of loose, nutrient-rich soil. Adding a slow-release fertilizer and a mycorrhizal stimulant helps the plants recover from transplant shock. Once the plants are in the ground, the final layer of mulch should be applied, taking care to keep the material at least 3 inches away from the trunks of trees to prevent bark rot. The final step is the calibration of the soil sensors. Within the first 48 hours, you should run a full irrigation cycle and monitor how quickly the soil drains to set the “Field Capacity” and “Wilting Point” benchmarks in your smart garden application.
Common Landscaping Failures
The most frequent cause of landscape decline is improper drainage. When water is allowed to pool around the root collar of a plant, it creates an anaerobic environment that fosters fungal pathogens like Phytophthora. Many homeowners mistakenly believe that if the surface looks dry, the plant needs water. However, the soil 4 inches down may still be saturated. This is why Smart Garden Soil Sensors are a superior alternative to manual inspection; they provide a vertical profile of moisture that the human eye cannot see.
Root overcrowding and improper spacing are other common pitfalls. When plants are installed too close together to achieve an “instant” full look, they quickly begin to compete for light and nutrients. This competition weakens the specimens and makes them more susceptible to pests like aphids or scale. Furthermore, using the wrong mulch can lead to disaster. Non-composted wood chips can actually rob the soil of nitrogen as they break down, leaving your plants yellow and stunted. Finally, soil compaction from heavy foot traffic or construction equipment can destroy the macropores in the soil, preventing air from reaching the roots. If your sensor data shows high moisture but the plants are wilting, it is often a sign that the soil is too compacted for the roots to actually absorb the water.
Seasonal Maintenance
A proactive maintenance schedule is required to protect the investment in a landscape. In the Spring, the focus should be on “awakening” the garden. This involves removing winter debris, testing the pH levels of the soil, and checking the batteries in your Smart Garden Soil Sensors. It is also the time to apply a pre-emergent herbicide to prevent weed seeds from germinating. As the temperature rises, monitor the sensors closely to adjust irrigation frequency.
Summer maintenance is primarily about stress management. High temperatures require deep, infrequent watering to encourage roots to grow deeper into the soil. Use the data from your sensors to determine if you need to apply a liquid seaweed extract to help plants cope with heat exhaustion. Autumn is the season for renovation. Aerate the turf to relieve compaction and overseed with perennial ryegrass or fescue. Reset your soil sensors to reflect the dormant state of the plants, reducing the water triggers significantly. In the Winter, focus on protection. Apply wilt-pruf to evergreens to prevent desiccation from cold winds. If you live in a region with freezing temperatures, ensure your irrigation system is blown out with an air compressor to prevent pipe bursts, though your sensors may remain in the ground if they are rated for freezing conditions.
Professional Landscaping FAQ
How many sensors do I need for a standard backyard?
Most residential landscapes require at least three sensors to cover different zones: one for the lawn, one for shaded beds, and one for full-sun areas. This ensures that the diverse microclimates on your property receive the correct amount of irrigation.
Can soil sensors help reduce my monthly water bill?
Yes, integrated sensors can reduce water usage by up to 40 percent. By preventing the irrigation system from running during rain events or when the soil is already saturated, you eliminate waste and significantly lower your utility costs every month.
Where is the best place to install a soil sensor?
Install sensors in the “active root zone,” usually 6 inches deep. Place them midway between the drip line of a plant and its trunk. Avoid areas directly under irrigation heads to ensure you are measuring soil moisture, not water spray.
Do these sensors work in heavy clay or sandy soils?
Modern sensors are calibrated for various soil textures. Most high-quality Smart Garden Soil Sensors allow you to select your soil type in the app, which adjusts the moisture algorithms to account for the unique drainage characteristics of clay, sand, or loam.
How long do the batteries usually last in wireless sensors?
Most professional-grade wireless sensors use Lithium-ion batteries or AA batteries that last between one and two years. Some advanced models feature small solar panels on the transmitter head, which can extend the battery life indefinitely in sunny locations.