
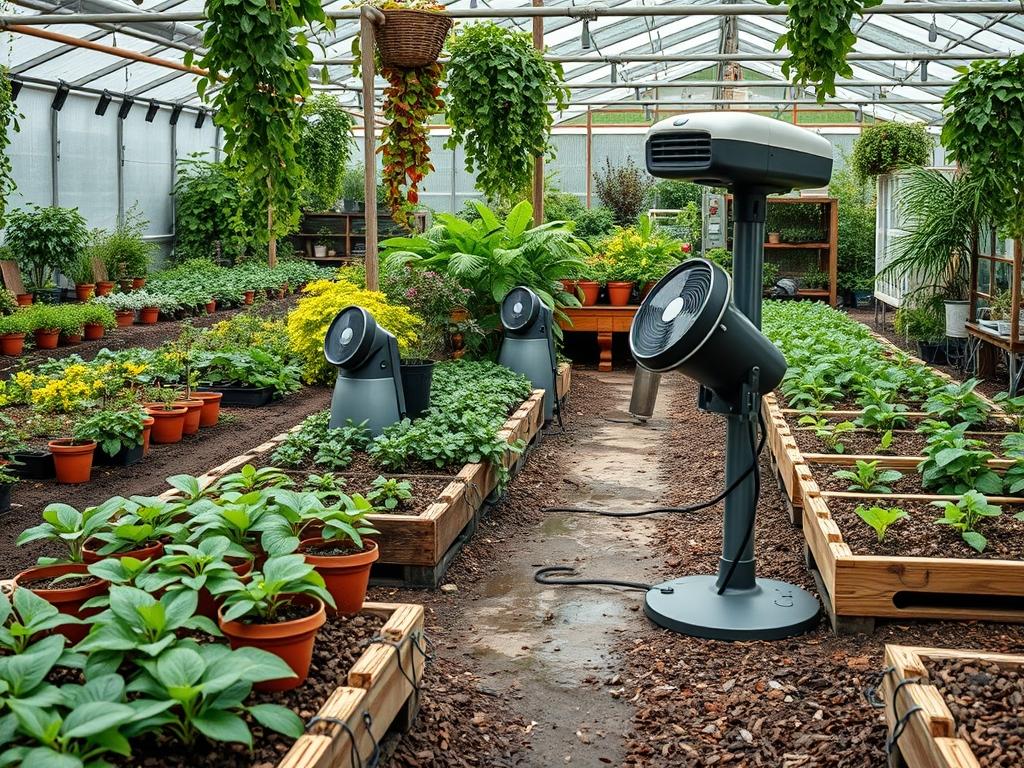
Greenhouse integration within a residential landscape requires a sophisticated balance between aesthetic appeal and functional environmental control. When we design outdoor spaces, the structure often serves as a primary focal point, yet its internal climate remains the most significant challenge for long term success. High temperatures can quickly transform a glass sanctuary into a heat trap, placing significant stress on delicate botanical specimens. To solve this without the logistical burden of running underground electrical lines, the implementation of Solar Powered Cooling Fans has become the industry standard. These units allow for passive energy harvesting while providing the active air exchange necessary to modulate humidity and heat. By positioning these fans strategically, a landscape architect ensures that the greenhouse remains a healthy, vibrant component of the larger garden layout rather than a stagnant eyesore.
Landscape Design Principles
Successful greenhouse placement relies on the principle of symmetry and visual balance within the garden. A greenhouse should not be an isolated island; it must be connected via defined Walkways made of Flagstone or Decomposed Granite to guide the eye and provide functional access. Elevation layers play a critical role here. We often recommend placing the structure on a slightly elevated Concrete Pad or a Crushed Stone Base to prevent water pooling and to create a clear architectural footprint. This elevated perspective allows the venting system to work more efficiently, as the height aids in natural thermal buoyancy before the mechanical assistance of the fan begins.
Focal points are established not just by the structure itself, but by the movement within it. The rhythmic sound and motion of Solar Powered Cooling Fans provide a sensory layer to the garden that signals a well managed environment. Irrigation planning must also be synchronized with your ventilation strategy. As fans increase air movement, evaporation rates change, requiring a more responsive Drip Irrigation System to maintain soil moisture. We look for a cohesive visual language where the solar components are mounted unobtrusively, ensuring that the sleek lines of the greenhouse are not interrupted by bulky or mismatched equipment. This balance of technology and nature defines modern outdoor living.
Plant and Material Selection
The following selection highlights species and materials that complement a high performance greenhouse environment and the surrounding landscape.
| Plant Type | Sun Exposure | Soil Needs | Water Demand | Growth Speed | Maintenance Level |
| :— | :— | :— | :— | :— | :— |
| English Lavender | Full Sun | Well Drained | Low | Moderate | Low |
| Japanese Maple | Partial Shade | Loamy/Acidic | Moderate | Slow | Medium |
| Blue Oat Grass | Full Sun | Sandy/Dry | Low | Fast | Low |
| Creeping Thyme | Full Sun | Poor/Rocky | Low | Fast | Low |
| Boston Fern | Indirect Light | Peat Based | High | Moderate | Medium |
| Star Jasmine | Full/Part Sun | Rich/Organic | Moderate | Fast | Medium |
Implementation Strategy
The installation process begins with a comprehensive site assessment focused on solar gain and orientation. You must identify the side of the greenhouse that receives the most consistent sunlight for the Photovoltaic Panel mounting. Ideally, the panel should face south to capture maximum irradiance during the hottest parts of the day when cooling needs are highest. Once the location is established, start by marking the dimensions for your Exhaust Fan on the upper gable end of the structure. Heat naturally rises, so the fan must be positioned at the highest point possible to pull out the warmest air.
Use a Reciprocating Saw or a Heavy Duty Utility Knife to cut the opening, depending on whether your greenhouse uses Polycarbonate Panels or glass. After creating the aperture, install Weatherproof Gaskets around the edges to ensure a tight seal; this prevents moisture from leaking into the frame during heavy rains. Secure the fan unit using Stainless Steel Screws and Mounting Brackets. Once the fan is seated, mount the solar panel on the exterior roof or a nearby Post. Use UV Resistant Zip Ties or Conduit to secure the wiring between the panel and the fan motor. This protects the electrical connections from degradation and keeps the aesthetic clean.
Finally, consider the intake side of the equation. Ventilation is a circuit. For every cubic foot of air the Solar Powered Cooling Fans exhaust, fresh air must enter through a separate Louvered Vent located on the opposite side and at a lower elevation. This creates a cross breeze that effectively lowers the ambient temperature by several degrees. Finish the area around the base of the greenhouse with a 3 Inch Layer of Natural Mulch to keep the surrounding soil cool and prevent dust from being sucked into the new ventilation system.
Common Landscaping Failures
The most frequent error in greenhouse landscape design is poor drainage planning. If the land is not properly graded to slope away from the structure at a rate of at least 2 Percent, water will collect at the foundation, leading to humidity spikes that overwhelm the cooling fans. Furthermore, root overcrowding often occurs when large trees are planted too close to the greenhouse. While shade is helpful, invasive roots can uplift the Retaining Walls or even penetrate the floor of the greenhouse itself. Professional planning requires a minimum 10 Foot Buffer between the structure and any large woody species.
Another failure involves improper spacing of the fans relative to the interior volume. A fan that is too small for the square footage of the greenhouse will spin constantly without achieving a meaningful drop in temperature. Conversely, over-sized fans can create wind stress on fragile seedlings. Irrigation inefficiencies also plague many setups; if the Spray Heads are positioned so they hit the solar panels or the fan housing, mineral deposits will build up, reducing the efficiency of the Photovoltaic Cells and potentially shorting out the motor. Cleanliness and precise positioning are the fixes for these common hurdles.
Seasonal Maintenance
Spring is the time for a full system audit. You should clean the Solar Panels with a soft cloth and mild detergent to remove winter grime, ensuring maximum energy absorption. Check all Wiring Harnesses for any signs of rodent damage that may have occurred during the colder months. As you move into summer, the fans will be under maximum load. This is the period to lubricate any moving parts if specified by the manufacturer and to ensure that the Intake Vents are free of debris or nesting insects. High heat requires peak performance from every component.
In autumn, the focus shifts to preparing for lower light levels and cooling temperatures. You may need to adjust the tilt of your solar panels to account for the lower sun angle in the sky. Clean the fan blades to remove accumulated dust and pollen, which can cause the motor to overwork. During winter, the primary role of the ventilation system changes from cooling to moisture control. Even in cold weather, a greenhouse can become too humid, leading to mold. Keep the area around the fan clear of snow and ice to ensure that the Automatic Shutters can still open when the sun hits the panel.
Professional Landscaping FAQ
How many fans do I need for a standard greenhouse?
Most residential greenhouses between 8 and 12 Feet in length require one high CFM exhaust fan paired with a passive intake vent. For structures exceeding 20 Feet, we recommend dual fan systems placed on opposite ends to ensure uniform airflow.
Where is the best place to mount the solar panel?
The panel should be mounted on the roof peak facing south or on a dedicated Mounting Pole nearby. Ensure there are no overhanging branches or architectural shadows that will block sunlight between the hours of 10 AM and 4 PM.
Can solar fans run at night or on cloudy days?
Standard units only run when the sun hits the panel. For 24 hour operation, you must integrate a Solar Battery Backup System. However, cooling is typically only required during peak sun hours, making standard kits very effective.
What is the ideal height for fan installation?
Install the exhaust fan as high as possible on the gable wall. This allows it to capture the hottest air trapped at the ceiling. The intake vent should be placed on the opposite wall, roughly 18 Inches above the ground.
Do solar fans require special permits for installation?
In most jurisdictions, low voltage solar equipment does not require a building permit. However, if you are mounting the fan on a permanent Masonry Structure or a large scale commercial house, check your local Zoning Ordinances and HOA guidelines first.