
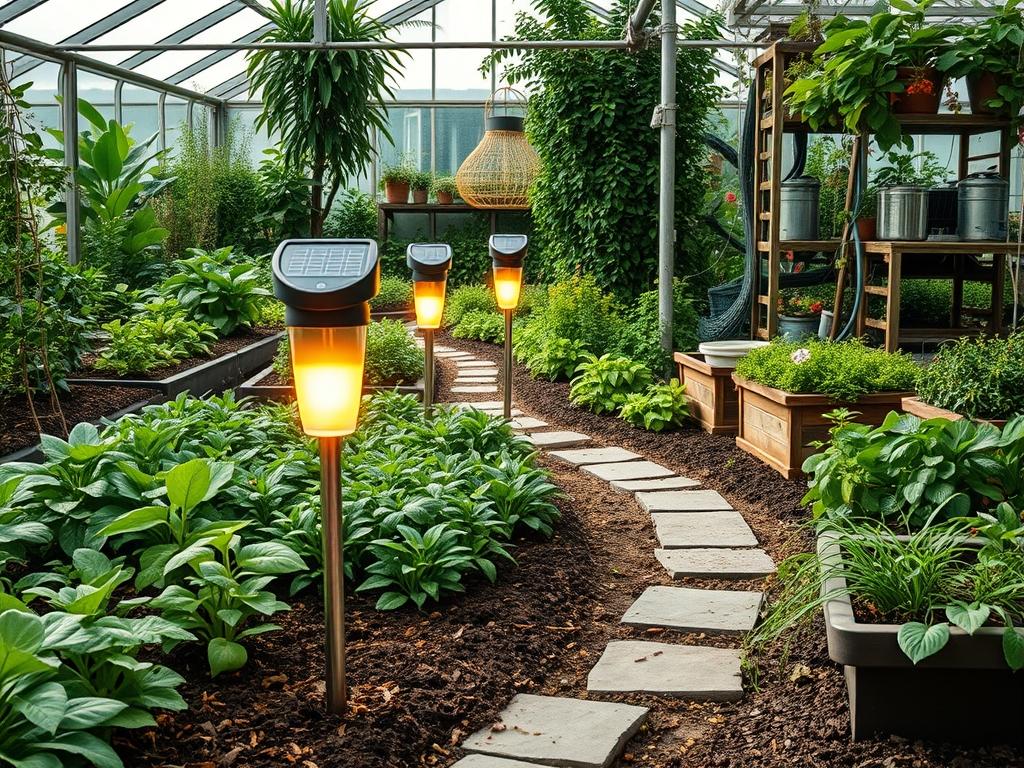
The transformation of a residential exterior from a functional plot of land into a sophisticated evening retreat depends heavily on the strategic application of light. For many homeowners and developers, integrating Solar Powered Path Lighting represents the most efficient way to achieve this goal without the logistical burden of high-voltage trenching or the recurring costs of electrical consumption. However, the market is saturated with low-grade fixtures that fail within a single season, leading to a landscape that looks cluttered by day and dark by night. Achieving a professional result requires a deep understanding of material durability, battery chemistry, and how light interacts with the surrounding physical environment. A well-planned lighting scheme does more than prevent trips and falls; it defines the edges of your garden, highlights textural changes in the foliage, and boosts curb appeal by providing a warm, welcoming glow that lasts until dawn.
Landscape Design Principles for Path Lighting
When architecting a landscape, we look at the site through the lens of visual balance and movement. The primary role of Solar Powered Path Lighting is to guide the eye along a predetermined route, but doing so with a series of equally spaced, identical fixtures often creates a sterile runway effect. To avoid this, professional designers utilize the principle of asymmetry. By staggering lights on either side of a walkway, you create a winding, organic feel that encourages a slower, more contemplative pace. This technique also allows you to highlight specific retaining walls or elevation changes that might otherwise represent a safety hazard.
Beyond simple guidance, lighting should serve as a layering tool. We categorize landscape lighting into three distinct layers: task, accent, and ambient. Path lights primarily provide task lighting, but when positioned near a focal point like a specimen tree or a stone sculpture, they contribute to the ambient glow of the entire garden. Symmetry should be reserved for formal entryways where a sense of grandeur and order is required. In more naturalistic settings, the light should appear to emanate from within the foliage. It is essential to consider the 50-foot view as much as the immediate surroundings; the lights should create a cohesive picture from the street while providing sufficient illumination for the person walking the path.
Plant and Material Selection
The longevity of your lighting system is intrinsically linked to the materials used in construction and the vegetation surrounding the fixtures. Cheap plastic housings will warp and cloud under intense UV exposure, whereas high-quality metals will patina gracefully. Below is a guide for selecting plant species that complement Solar Powered Path Lighting without obstructing the necessary sun exposure for charging.
| Plant Type | Sun Exposure | Soil Needs | Water Demand | Growth Speed | Maintenance Level |
| :— | :— | :— | :— | :— | :— |
| Liriope Muscari | Full Sun to Shade | Well-Drained | Moderate | Medium | Low |
| Creeping Thyme | Full Sun | Sandy/Loam | Low | Fast | Low |
| Blue Star Creeper | Partial Sun | Moist/Rich | Moderate | Fast | Moderate |
| Dwarf Mondo Grass | Partial Shade | Clay/Loam | Moderate | Slow | Very Low |
| Sedum Autumn Joy | Full Sun | Poor/Gravelly | Low | Medium | Low |
When selecting the hardware, prioritize die-cast aluminum or solid brass housings. These materials provide the weight and structural integrity needed to withstand accidental bumps from a lawn mower or string trimmer. The lens should ideally be made of tempered glass rather than acrylic, as glass remains clear over years of service, ensuring the lumen output does not degrade over time.
Implementation Strategy
The successful installation of Solar Powered Path Lighting begins with a detailed site analysis focused on solar gain. Each fixture requires approximately 6 to 8 hours of direct sunlight to provide a full night of illumination. Use a sun path map or a digital light meter to identify areas where shadows from the roofline or large canopy trees might limit charging. Once the locations are marked, the grading of the soil must be addressed. Ensure that the ground is level and well-drained; standing water around the base of a solar stake can lead to corrosion of the internal circuitry, even in “weatherproof” models.
Start your layout by placing the first light at a primary transition point, such as where a driveway meets a walkway. Use a rubber mallet to drive a pilot hole into the soil if the ground is compacted, rather than forcing the solar stake down by hand, which can snap the plastic or metal neck. For a professional finish, integrate the lights into your edging strategy. Placing fixtures roughly 6 inches back from the hardscape edge allows for easier maintenance and protects the units from foot traffic. If you are using mulch, ensure the depth does not exceed 3 inches near the light base, as excessive mulch can retain too much moisture and promote fungal growth around the fixture.
Common Landscaping Failures
The most frequent mistake in path lighting is the failure to account for the “light footprint.” Many homeowners buy fixtures with a low lumen count and place them too far apart, resulting in dark gaps that make the path difficult to navigate. Conversely, using high-intensity lights with a cool blue color temperature (above 5000K) can create a harsh, clinical atmosphere that clashes with the organic tones of the garden. Aim for a warm white temperature of approximately 2700K to 3000K to mimic the inviting glow of traditional incandescent bulbs.
Another common failure involves the neglect of drainage and soil compaction. In areas with heavy clay soil, water can pool at the base of the light, eventually breaching the seals of the battery compartment. This is often exacerbated by improper irrigation planning. If a sprinkler head is aimed directly at a solar panel, it can cause mineral buildup or “hard water spotting,” which blocks sunlight and reduces charging efficiency. Finally, avoid root overcrowding. Planting fast-growing shrubs too close to your lights will eventually shade the panels, rendering the Solar Powered Path Lighting useless within a few months of the growing season.
Seasonal Maintenance
To ensure your investment lasts for several years, a seasonal maintenance routine is mandatory. In the Spring, use a soft damp cloth to wipe away pollen, bird droppings, and dust from the solar panels. This is also the time to check for any heaving caused by the winter freeze-thaw cycle. If the stakes have become crooked, reset them using a level to ensure a professional vertical alignment.
During the Summer, focus on managing the surrounding vegetation. Use hand pruners to trim back any overhanging leaves that are casting shadows on the panels. As Autumn arrives, clear fallen leaves promptly. Decaying organic matter can produce acids that stain the metal finish of the lights and block the sun. In Winter, if you live in a region with heavy snowfall, it may be necessary to clear the panels after every storm. For extreme climates, consider removing the internal Lithium-iron phosphate batteries and storing the fixtures indoors to prevent the cold from permanently reducing the battery capacity.
Professional Landscaping FAQ
How many lumens do I need for a standard garden path?
For most residential walkways, a brightness of 10 to 20 lumens per fixture is ideal. This provides enough light for safety without creating glare. High-traffic areas or commercial entries may require up to 50 lumens for better visibility.
Can solar lights work in shaded garden areas?
Standard solar lights struggle in full shade. However, some high-end units feature a detached solar panel connected by a 10-foot wire. This allows you to place the panel in a sunny spot while the light remains in the shade.
What is the average lifespan of a solar path light battery?
Most rechargeable batteries in solar fixtures last between 1 and 2 years. Replacing them with high-capacity NiMH or LiFePO4 cells can extend the life of the fixture and improve the duration of the light throughout the night.
Should I choose glass or plastic lenses for my lighting?
Always prioritize tempered glass. Plastic lenses tend to yellow and become brittle when exposed to constant UV rays. Glass remains clear, ensuring that the light distribution remains consistent and the aesthetic quality of the landscape is maintained over time.
How far apart should I space my solar path lights?
For a balanced look, space your lights 4 to 6 feet apart. If you want a more subtle, mood-driven effect, you can increase the distance to 8 feet. Avoid placing them in a straight line for a more natural appearance.